I picked up this antique twin bed from a thrift store. It has a beautiful design, and includes the rails and slats.
 |
| BEFORE: Antique bed. |
It was in good condition for it's age, but the original finish was worn. My plan is to paint the piece, but I want to capitalize on the worn finish to highlight the vintage character.
 |
| Damaged wood finish on antique bed. |
I tested mixing various colors on scrap paper before I applied the paint to my furniture. I wanted to make sure the colors blended well together first.
 |
| Test colors before blending. |
My design for the color scheme is blue on the panels with a white trim. I wanted a soft dreamy blue. My initial color was a little to bright, so I added some white and light gray to tone it down. I know it looks like a hot mess now, but
this paint is perfect for layering and blending.
 |
| Layering blue, gray and white paint. |
I added some water to my brush, and then I lightly started to blend the colors from the center outwards. I added touches of more color as needed until I got the effect I wanted.
 |
| Use water to gently blend the paint colors. |
I repeated the process on the back of the headboard and then both the front and back of the footboard. Next I taped off the panels and painted the trim and the bed rails.
After:
I finished the project with a bit of distressing to the details and then sealed it with clear wax.
 |
| Painted antique bed. |
 |
| Light distressing of paint. |
The original worn finish was naturally highlighted by gently sanding the paint.
 |
| Gentle sanding brings out the vintage charm. |
I was pleased with the soft vintage finish!
 |
| A soft vintage finish. |
The color variations in the panels is subtle.
 |
| Subtle color variations. |
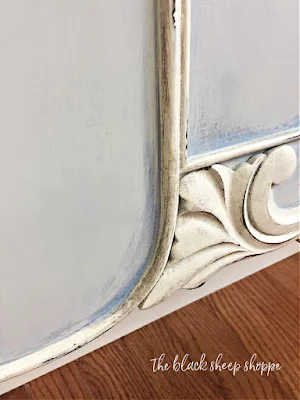
I think the details on the original finish were lost, but the contrasting colors help the details pop.
 |
| Contrasting trim paint. |
 |
| Color variation. |
I also love the look of the turned wooden legs.
 |
| Painted wood legs. |
A closer look shows the details of the painted finish.
 |
| Distressed painted finish. |
I mentioned earlier that I also painted the side rails. They are painted and distressed to match the trim paint. I didn't paint the inside of the rails since that will be hidden by a mattress.
 |
| Painted antique side rails. |
I did test the assembly of the bed prior to taking it to my booth.
 |
| Painted antique bed. |
I hope you enjoyed today's project!
 |
| Antique headboard and footboard. |


Absolutely stunning Patricia! Looking at the before and after photos together clearly shows how impressive this makeover is. Love the paint techniques and colors you used. Pinned.
ReplyDeleteThanks so much Marie!
Delete