Blog Post 305: DIY Large Wood Sign
I had a chalkboard that I made a year or so ago that I used as a prop for staging. It is a 2' wide x 4' high hardback board framed with wood trim (purchased at Home Depot). I painted the hardback with chalkboard paint. For the sentiment I decided to use a quote about happiness by John Lennon.
(For your convenience, affiliate links are included in this blog post for the products I personally used for this project.)
A project this size would have been difficult using individual alphabet stencils, however I was lucky to receive a Silhouette cutting machine for my birthday this year, so I used that to create the letters. Before cutting the letters on vinyl, I did a rough draft on cheaper card stock so I could practice the layout. Even though I was careful with the layout, I did end up getting the spacing of the letters a little off here and there, but overall it worked out OK. I learned from my mistakes and the next sign I did turned out better.
Once I was happy with the layout I set the machine to cut the letters on matte removable vinyl and then weeded out the white space around the letters.
I used transfer paper to move the letters onto the board. I thought this step would be easy, but the letters didn't stick as easily as I expected them to. I ended up using a spatula tool to coax the letters onto the transfer paper and that made the process go much more smoothly. The spatula did not come with my machine, so I bought it separately as part of a tool kit.
I drew chalk lines as a guide for the placement. The chalk lines will later be covered with paint, so the lines won't show.
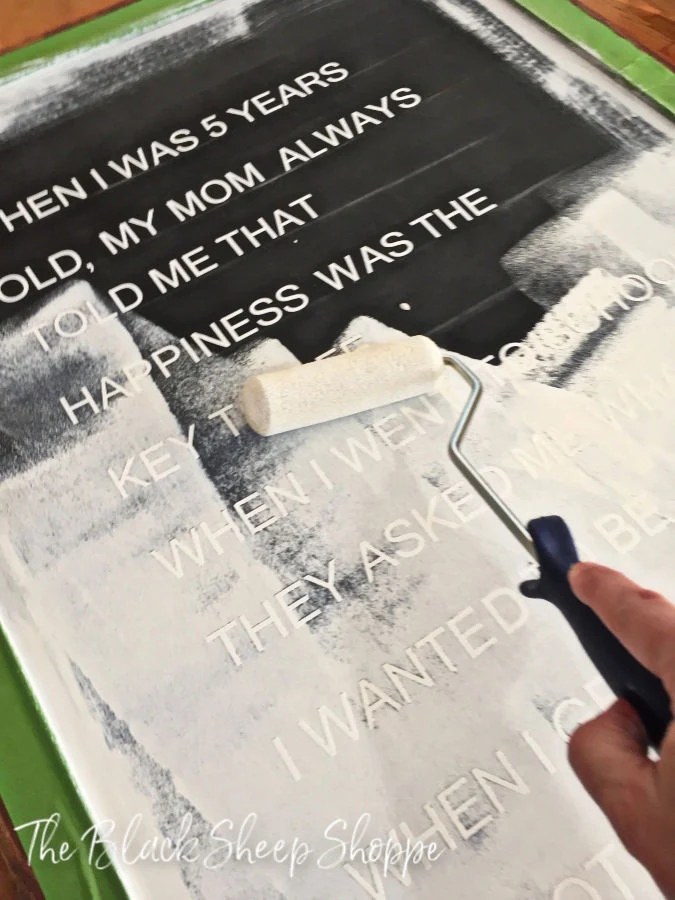
After I transferred all the letters to the board, I used a foam roller to paint the board with a matte finish acrylic paint. I purchased my paint in the craft aisle at Walmart for about $6 for an 8 oz. jar and used half the paint for this project.
Once the paint was dry I used the spatula tool to remove all the vinyl letters.
So many letters! It was tedious, but once I got started I got into a rhythm, and it went fairly quickly.
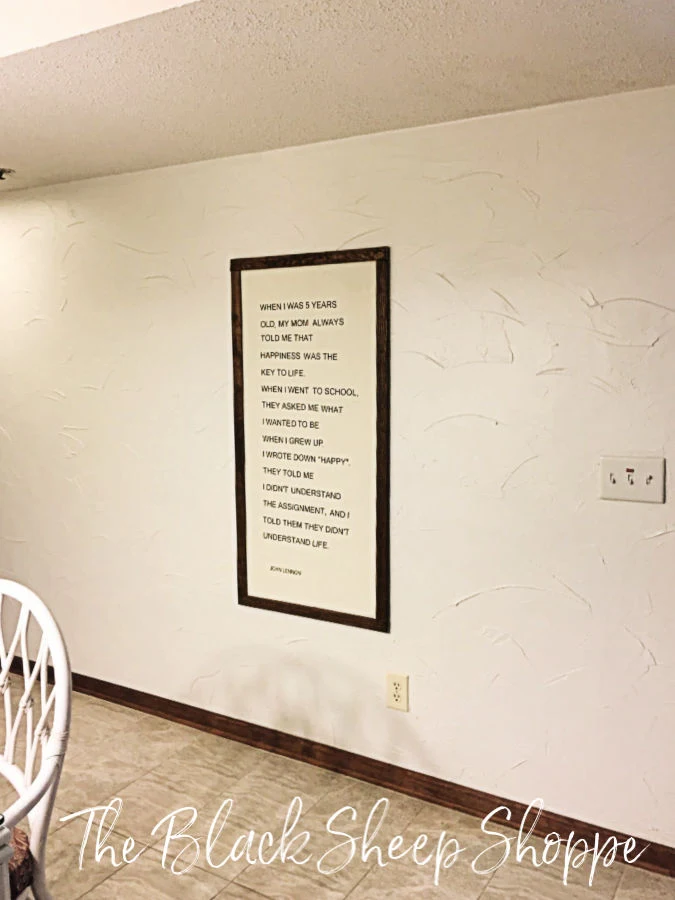
Finally my trip to North Carolina was here and I was able to hang my sign! I think the sign fills up the blank wall nicely. It's not the best angle for a photo, but the rest of the room was full of tools and paint that I used for other projects, so this was the best shot that didn't include the disorganized mess.
The main project for this trip to North Carolina was to paint the vanity in the master bathroom. I'll share those photos soon. In between projects I took breaks to take in the view from the balcony and went for walks on the beach. It certainly makes me happy to visit, and I hope the vacation renters enjoy the new "happiness sign" as well as the view!


Comments
Post a Comment
Select the NOTIFY ME box to receive a notification of a reply to your comment (yes, I do try to acknowledge all comments). There might be a publishing delay on older posts as they are moderated to reduce spam.