
Let me show you the best way to stencil a floor with excellent results. With the right tools and a little practice (more about that later) you'll see just how easy it is.
And is it really easy? Yes, ONE tile is very easy. But a project the size of this room is very labor intensive and time consuming. It took me seven days from start to finish. So plan accordingly.
BEFORE:
First let's take a look at before photo of the kitchenette in my basement. Some might say it's a little dated.
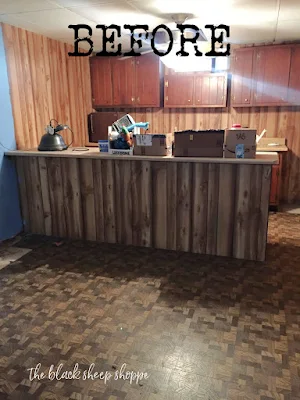 |
| Before photo of my basement kitchenette. |
We are slowly working on updating our basement. We removed the bar and painted the kitchen cabinets and paneling. We still need to replace the countertop, fan, and ceiling tiles. Baseboards will be installed at a later date.
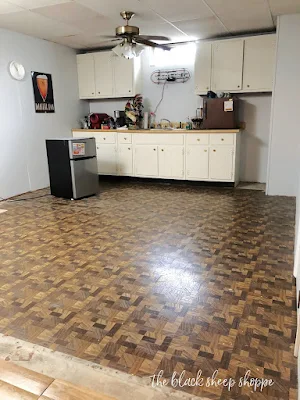 |
| Updating a basement kitchenette. |
Eventually we would like to cover the old tiles with plank flooring. But I am tired of looking at the old floor, so for less than $200 I will paint and stencil the floor.
 |
| Budget friendly project to update your floor. |
At first glance it doesn't look so bad, but take a closer look and I'll show you the damaged areas. I am not making repairs to the damaged tiles. Instead I hope that the stencil technique will camoflauge the imperfections (spoiler alert: it did!).
 |
Use cardboard boxes to practice stenciling.
(photo credit Shutterstock Basic) |
If you've never stenciled before, or if you've stenciled with poor results, then I recommend you practice the stenciling method I detail below (step 3) on pieces of cardboard first. Open up leftover Amazon shipping boxes and lay them flat. You'll get your technique perfected and be a pro in no time! You can also configure a box to create a "fake wall" so you can practice stenciling against a wall.
STEP 1: CLEAN, CLEAN, CLEAN
Day 1
 |
| No-rinse deglosser is essential. |
Of course you need to have a clean surface before painting! I vacuumed and mopped and vacuumed again.
But before that, say 3 months beforehand, start doing stretching and yoga. Seriously. This was a large floor to stencil. I felt it in my back, legs, and knees.
I hand-scrubbed the floor with a sponge using a no-rinse
deglosser. This step is essential for the best result. I taped off the perimeter of the walls before beginning.
STEP 2: ROLL BASE COAT
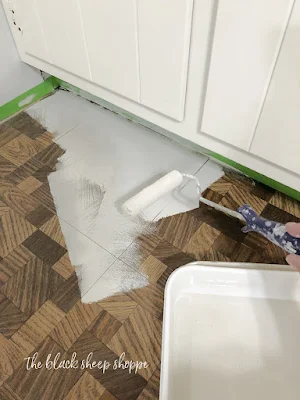 |
| Roll on a base coat. |
The
paint I am using has a built-in primer. If you use a different paint brand be sure to check if a primer is necessary. Or if your surface is very smooth then you might need a bonding primer.
I rolled on the first coat of the base color with a 4" roller. In hindsight I probably could have used a larger roller, but I felt the smaller roller gave me more control and used less paint.
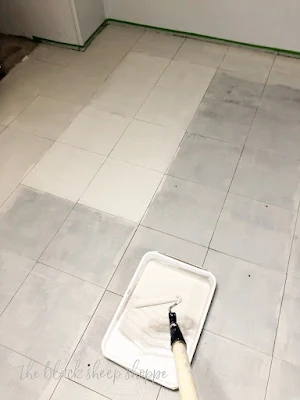 |
| Roll on a second coat of paint. |
Day 2
I rolled a second coat of the base color.
 |
| Two coats of the base color applied. |
What a difference the second coat makes! I let the paint dry and cure overnight.
STEP 3: STENCIL!
Day 3
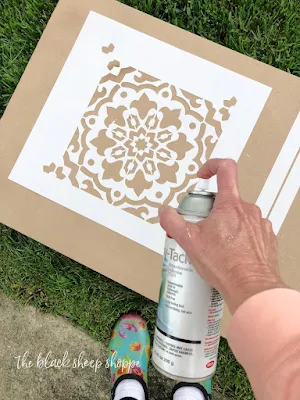 |
| Low tack spray adhesive on stencil. |
This step is essential! Apply an even coat of
low-tack repositionable adhesive spray to the back of the stencil. This should be done outdoors. I reapplied the adhesive at the start of each day throughout the course of my project.
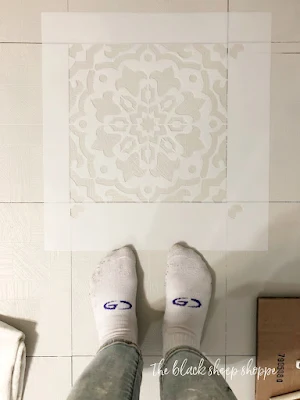 |
| Aligning the stencil with the old tile. |
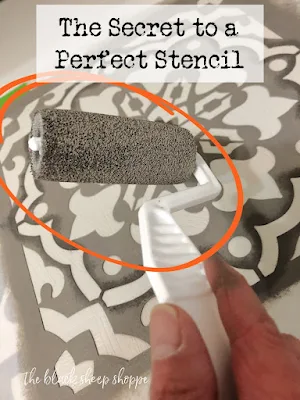 |
| This roller is the secret to a perfect stencil. |
But the secret to achieving the best stencil result is using a foam sponge roller. Not just any foam roller! Although others are labeled foam, the foam is too dense and doesn't absorb the paint well for stenciling. This one has a sponge with open cells which will give the best results for controlling the paint and preventing it from seeping underneath the stencil. I have stenciled previously using a variety of roller types, but this one is the best by far.
 |
| Off-load paint onto cardboard. |
Lightly load the roller with paint and then off-load the paint onto a piece of cardboard.
 |
| Rolling paint over the stencil. |
Lightly roll the paint over the stencil. Apply more pressure as needed to release more paint. Reload paint if needed, but the key is to use the least amount of paint needed to get good coverage.
 |
| Pouncing paint onto a stencil. |
I chose to use two colors for my stencil. It really added to the labor of this project, so if you can talk yourself into one color, then do that.
Before I lifted my stencil, I lightly pounced my second (darker) color over the first (lighter) color. The first color wasn't completely dry, but it was such a light coat that it didn't matter. The darker color was easy to apply, however pouncing larger sections is time consuming. You'll see that I change my method the next day.
 |
| Gently lift the corner of the stencil. |
Gently lift the stencil from the corner and pull it up.
 |
| Repeating stencil. |
Then repeat! (I am leaving the perimeter tiles for last.)
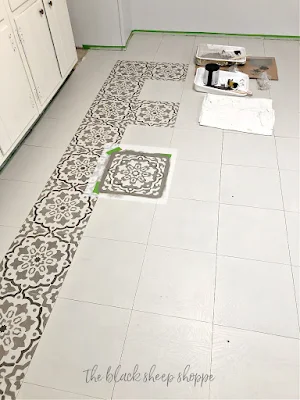 |
| Stencil every other tile to begin. |
I stenciled every other tile in a row to allow the paint to dry and avoid smearing. By the time I finished one row the paint was dry enough to continue. I finished up the third day of my project with basically only two rows completed. I loved the result so far, but it was taking way too long! I was discouraged and couldn't see the finish line anytime soon.
STEP 3 (MODIFIED):
Day 4
 |
| Use painters tape for a two-toned stencil. |
If you're using one color on your stencil then you're probably done by now since it's quick to roll out the paint. But my two-color method was going painfully slow. So I changed my plan. I taped off the areas on the stencil where my second color will go.
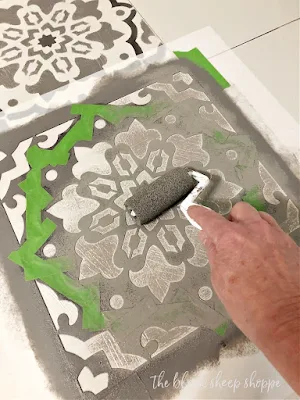 |
| Roll first color over stencil. |
Then I lined up my stencil and quickly rolled my first color.
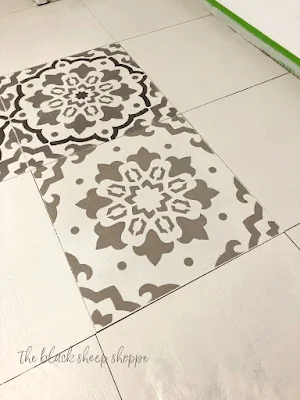 |
| Stenciling in progress. |
My new plan is to paint the first color and then come back later and add the second color.
Day 5
 |
| Applying the second stencil color. |
Once the first color was stenciled and dry, it was time to go back and add the second color. (Remember to reapply the low-tack adhesive to the back of the stencil each day or as needed.)
 |
| Rolling on the second color. |
I removed the tape from my stencil and reapplied fresh tape around where I would roll the second color. I realigned the stencil then quickly rolled on the second color. It might seem like twice the work, but the rolling method was so much faster than the pouncing method.
THE PERIMETER:
Days 5 and 6
 |
| Getting ready to stencil the perimeter. |
The perimeter tiles and corners can be tricky. Mine are not full tiles, plus I also had to work underneath the cabinets. One option is to cut the stencil, but I didn't want to ruin my stencil!
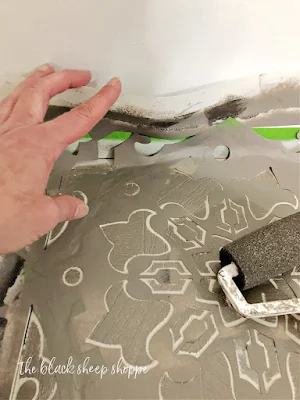 |
| A good quality stencil is flexible and will bend. |
Instead I lined up my stencil and pushed the edge as far as it would go. I used one hand to push down on the top edge of the stencil and the other hand to push the roller as close as possible to the wall.
 |
| Stenciling the perimeter tiles. |
The stencil doesn't have a crisp edge along the wall, but instead just sort of fades away. Later we will add baseboards, so this won't be as noticeable. But even so I think it looks fine.
 |
| Fold the stencil underneath the cabinets. |
I used the same process underneath the cabinets. I rolled the top of the stencil towards me, lined up the bottom of the stencil to the tile, and then released the top and let it fall into place as far as it would go.
 |
| How to stencil a floor against cabinets. |
SEALANT:
Day 7
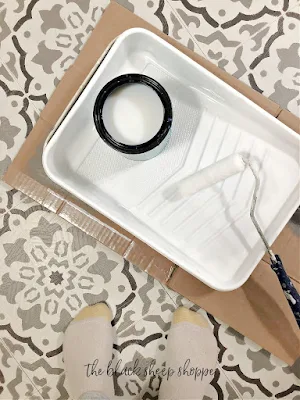 |
| Applying sealant to a painted floor. |
Finally I have made it to the finish line! The paint has a built-in top coat, but for a floor I definitely want to add extra protection and seal it. I used a water-based polycrylic. It looks milky white in the can, but it goes on and dries clear.
I rolled a coat of sealant on in the morning and let it dry. I rolled a second coat in the afternoon. A third coat could be added, but I was tired, so I called it finished.
AFTER:
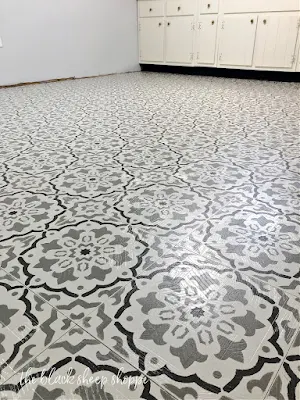 |
| Stenciled tile floor. |
And finally the stenciled floor is finished! I think the total was 176 tiles. Whew! It was a big job.
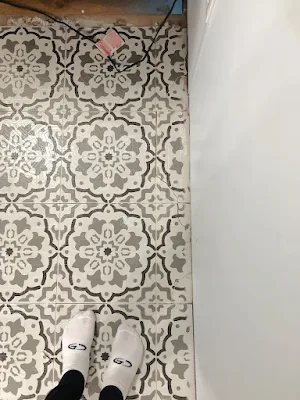 |
| Damaged tiles camoflauged by stencils. |
Remember the damaged tiles? I'll put in some before and after shots at the end of this article. But for now I think you'll see the damage is still there but no where near as noticeable.
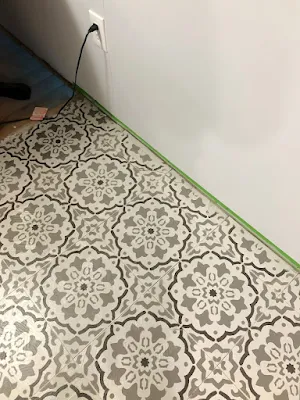 |
| Damaged tiles look as good as new. |
The painted stencil pattern camoflauged the damaged tiles.
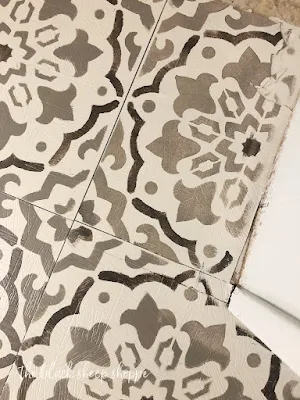 |
| The stencil pattern hides the damage. |
The broken tile in the corner is barely noticeable now.
 |
| It's hard to spot the damaged tile. |
There was a large hole in this section, but you can't really spot it at all now.
BEFORE AND AFTER STENCILED FLOOR:
 |
| Before and After Stenciled Floor |
 |
| Damaged tiled floor before and after. |
.jpg) |
| Updated floor for under $200. |
SUPPLY LIST:
This includes Amazon affiliate links to the products I actually purchased. If you use different brands you might get different results. So be sure to research the brands you are using and practice first.
- Deglosser
- Scrubby Sponge
- Gloves
- Painters Tape
- Paint tray and plastic liners
- 4" Rollers for base coat and sealant
- Paint roller extension stick (optional)
- Paint (I purchased two quarts of Putty for the base coat; stencil colors are one quart each of Stonehenge and Abbey. I used a full quart of Putty, about 3/4 quart of Stonehenge, and maybe 1/4 of the Abbey.) I waited for the paint to go on sale for $25 per quart. I will use the remaining paint for my bathroom floor.
- Stencil
- Low tack spray adhesive
- Foam sponge rollers for stencil. The link is to the rollers I used for this project. (I have also used this brand previously with good results, plus they're a little cheaper.)
- Stencil brush (optional)
- Sealer (I bought 1 quart clear satin. I used maybe 1/2 the can.)


.jpg)


Very nicely done! It looks great. Thanks for sharing. :-)
ReplyDeleteThank you!
DeleteWOW! Amazing!
ReplyDeleteThank you!
Delete