This was the easiest fence I've ever built! Actually it's the only fence I've ever built. Truthfully it was really just assembly. But I am happy with my project nonetheless!
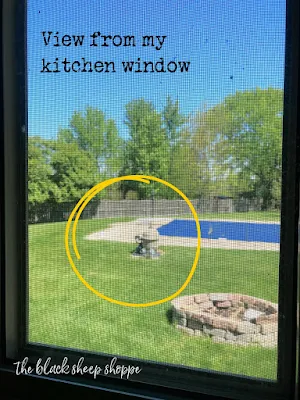
Let's take a look out of my kitchen window. (The photo isn't crystal clear because of the window screen.) From here you can see the hardworking pool pump. I am very grateful for my pool pump. But as much as I appreciate it, I have to admit it's a bit of an eyesore to look at. I wanted a quick and affordable way to conceal the pool pump.
We've kicked around some ideas about building a screen around it, but there are so many other projects on our list I knew it wouldn't happen anytime soon. We are coming up on our fourth pool season at this house, so when I found this
privacy screen online I was super excited! I did end up ordering two sets so it would be large enough to conceal most of the pump. Luckily I was able to find it on sale, so cost wise it wasn't too bad.
SOME ASSEMBLY REQUIRED:
Well yes indeed there is some assembly required! But honestly the design is well thought out and it was easy to put together. We started the assembly inside, but decided we would have more room outdoors. Plus it was a lovely Spring day to go outside and enjoy the sunshine!
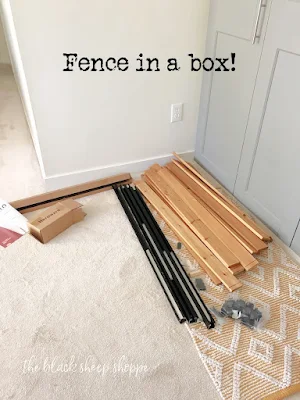 |
| A fence in a box! |
A
power drill is required, but the package contained a drill bit, so that was very convenient.
 |
| Starting the assembly of the fence. |
Once the first slat was screwed into place we simply slid the spacers and boards into the posts.
 |
| Simply slide the slats and spacers into the posts. |
We squared up the panel and then drilled holes into the top slat. I used a screw driver for the screws, but later changed the drill bit and used the power drill instead. I screwed the last board into place and then it was time to move onto the next panel.
 |
| Drill holes then screw into place. |
So far so good, but we forgot to screw the metal spikes in, so we had to take the screws out of the bottom board and insert the spikes. Then we reattached the screws. We were experts after the first panel was completed. The other three panels were completed more efficiently.
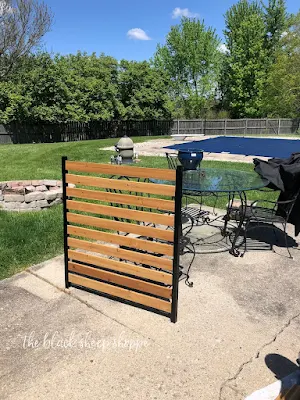 |
| Easy fence assembly. |
Now one is done! Three more to go!
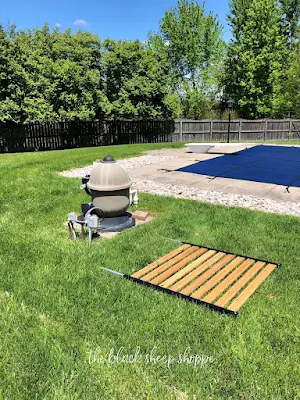 |
| Once section assembled and ready for installation. |
The hardest part of the job was hammering the spikes into the ground. I took a turn hammering: tap, tap, tap. But I made zero progress. My husband took over, and THWACK! THWACK! THWACK! Into the ground it went.
I didn't get photos of the process since I was holding the fence panels. But my husband hammered a heavy spike we had into the ground to start the holes, and then we placed the panel into place. He set a block of wood on top of the post to help protect it from the force of the sledge hammer. Then he hammered it into the ground.
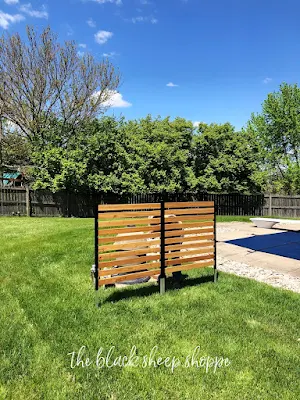 |
| Two of four fence panels installed. |
AFTER:
It's not 100% where I wanted it placed, but we had to be mindful of underground electric lines, but overall I am very pleased.
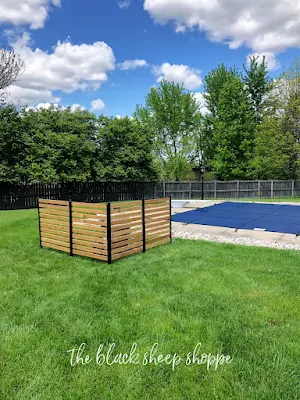 |
| Privacy fence screen installed. |
We do need access to the pump, so we didn't fully enclose the area. We could add more panels later, but most likely we won't.
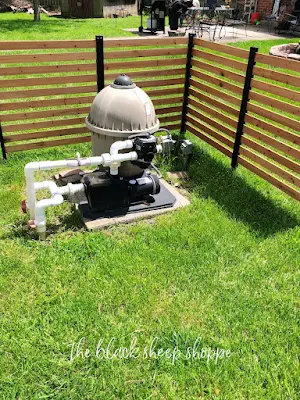 |
| The back area is open for easy access to the pump. |
Once all the panels were in place we screwed them together with the brackets that were included. Separately the panels were slightly wobbly, but once they were secured together with the brackets they felt solid. Not solid enough to climb on, but I don't think it will blow over in a wind storm. Once we're sure about how it holds up we will probably add some landscaping around it.
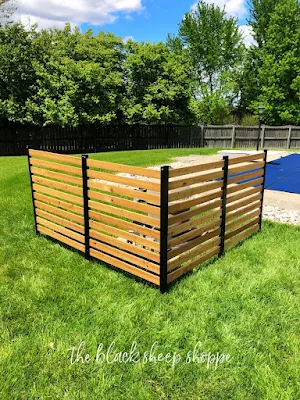 |
| Fence to conceal swimming pool pump. |
The company does offer different styles and sizes of fencing. I chose this style specifically because there are spaces between the slats. It provides screening but doesn't completely obstruct the view of the pool. I like to have an open sight line to the pool for safety purposes.
Let's head back and take another look now from my kitchen window:
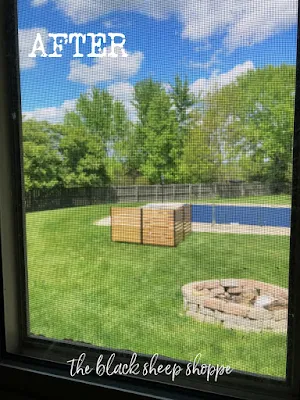 |
| View from my window with pool pump screened. |
I'll save you scrolling back up to see the "before". Here's a before and after:
.jpg) |
| View from my window: before and after. |
I bought the panels on sale for about $130 per set of two with free delivery. So for less than $300 we got this project crossed off our list in under two hours.
Thank you for visiting The Black Sheep Shoppe. I hope you enjoyed today's project.
SUPPLY LIST:


.jpg)


Comments
Post a Comment
Select the NOTIFY ME box to receive a notification of a reply to your comment (yes, I do try to acknowledge all comments). There might be a publishing delay on older posts as they are moderated to reduce spam.