Today's project features my tried and true method for painting raised panel doors. Not only does it provide a consistent finish, it also reduces the number of coats needed which saves both time and money. Typically I get excellent coverage in only two coats even with white or light colors.
MISMATCHED STYLES:
But before we begin painting, let me introduce you to my doors. My home has three entry doors and each has its own style, and each door is painted in a different shade of white. I planned to replace all the doors in my home when we first bought the house. But other projects took priority. So I decided to freshen them up with paint until such time as they can be replaced.
My hope as I begin the project, is the coordinated paint color will help unify the otherwise mis-matched styles. The first door is a farmhouse style. The front door (seen in the background) is a more traditional Colonial style. The third door is also a traditional style, but still different from the front door. It's not shown in the article since it's in a tight hallway, and I would tumble down the basement stairs if I wanted to photograph it!
 |
| White farmhouse style door. The door in the background is traditional style. |
I briefly considered a bright and cheerful color, but decided instead to keep it neutral for now. White of course is the traditional choice. Black is very popular now, but the dark color shows every speck of dust. So I landed in the middle with gray. I selected Behr Whitewash Oak which is a light warm gray. It sure looked white to me when I opened the can, but it definitely shows gray when it is next to an actual white.
 |
| Paint stir stick resting inside an open can of Behr Whitewash Oak paint. |
SUPPLIES:
- Paint (Behr, purchased at Home Depot)
- Angled brush
- Small 4" roller (I buy the 1/4" nap as it is best for most of the projects I work on.)
- Paint tray
- Drop cloth
- Painter's tape
I taped off any sections that I wouldn't be painting. I used an angled brush to cut in and paint the outer edges of the door and the area around the raised panels.
 |
| Brushed gray paint on the door knob and edges. |
TWO STEP METHOD | PAINTING RAISED PANELS:
I follow a two-step method for painting the raised panels.
Step 1: First I paint the uneven surfaces (which I think is called the "sticking") with an angled brush. This step assures that paint is worked into the corners and tight spots where a roller won't reach. But the bristles from the brushes don't provide even coverage, so on to Step 2 . . .
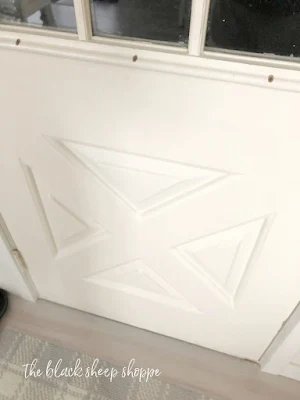 |
| Paint raised panels in two easy steps. |
Step 2: While the brushed on paint is still wet I use a small paint roller to lightly smooth over the brushed areas. This step evens out the brush strokes, gives a consistent finish, and generally speeds up the painting process as it requires less coats of paint for full coverage.
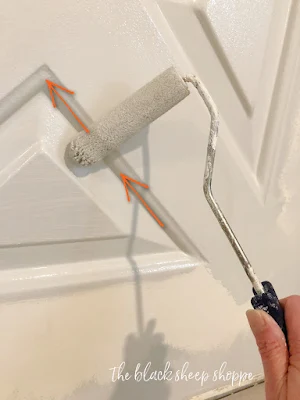 |
| Lightly rolling over brushed paint will even out the brush strokes. |
I load my roller with paint and then off-load most of it before working in the small areas. Most of the paint coverage comes from the paint applied with the brush in Step 1. The roller is simply to provide an even and consistent texture. I angled the small roller into the area around the raised panels and lightly rolled it back and forth.
 |
The roller provides consistent texture over the brushed paint.
|
The first coat of paint had great coverage! I repeated the process and applied a second coat for full coverage.
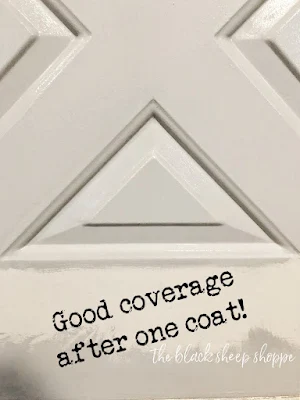 |
| Painted raised panels after one coat of paint. |
After the second coat was dry I removed the tape and the first door is finished! The style of the door still isn't what I wish for, but I do like the new color!
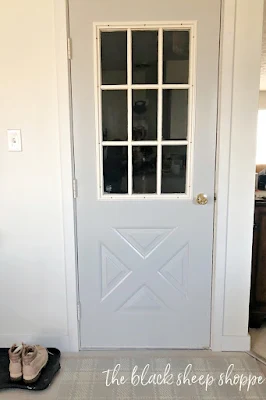 |
| Subtle gray paint freshens up the door. |
DOOR NUMBER TWO:
I repeated the same process for the front door. Again I cut in first with a brush and then rolled. The photo below shows the contrast between the old and new colors.
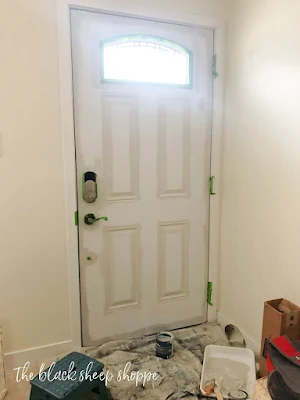 |
| Gray paint being applied to white door. |
Two coats later and the door is finished. I finished both doors in one afternoon and evening. Each coat took me about 30 minutes per door exclusive of drying time. I painted the third door the next day.
 |
| Two coats of gray paint on front door. |
I am very pleased with the door color! I choose a light warm gray so it would compliment my wall color (SW Dover White).
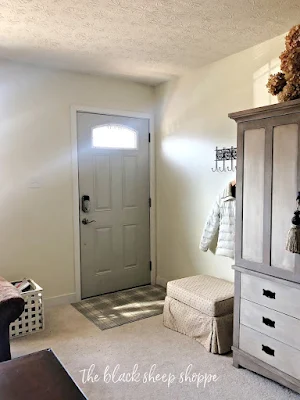 |
| Whitewash Oak pairs nicely with SW Dover White wall color. |
The gray adds just a touch of color to break up the otherwise white space.
 |
| The painted door adds subtle color to the room. |
A close up photo shows the gray next to the white trim with the warm white wall in the background. I am very pleased with my color selection for this project.
 |
| Behr Whitewash Oak with SW Dover White. |
 |
| Easy method for painting a door. |


Comments
Post a Comment
Select the NOTIFY ME box to receive a notification of a reply to your comment (yes, I do try to acknowledge all comments). There might be a publishing delay on older posts as they are moderated to reduce spam.