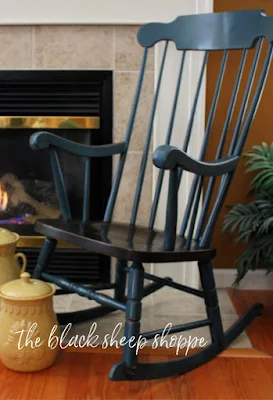
This is a second re-do of an old rocking chair that I purchased at a local thrift store. The first time around was a custom color selection by my daughter in Aubusson Blue and Graphite. Fast forward a few years and the chair no longer worked in her space, so she returned it to me.
Was I offended? Heck no! I was fresh out of furniture projects and looked forward to giving this chair a new look. Score for the second time around!
As much as I love the initial color scheme, I decided to give the chair a lighter and brighter look this time and painted the entire chair in
Bliss. The overall color seemed a little flat to me, so I decided to give the seat a quick blended paint treatment.
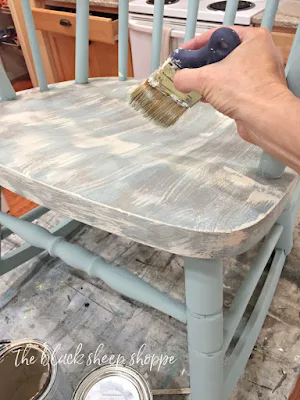
First, I brushed on some Cocoa and Antique White all over the seat.
Next, I dipped my brush lightly in water.
And then I brushed the wet brush over the paint and blended it together. I didn't blend it 100%, but instead left some variation in the color.
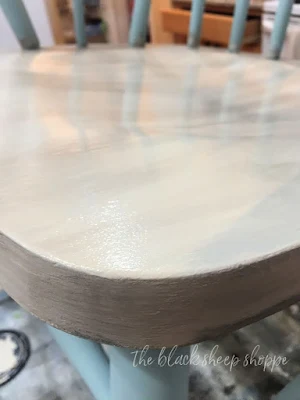
Here's a close up of the blended paint while it is still wet.
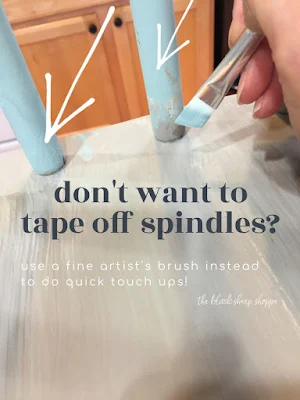
You might have noticed that I didn't tape off the spindles while I was working on the chair seat. Not to worry as it was part of my lazy paint technique. After the paint on the seat was dry, I used an angled artist's brush to touch up the messy areas with the original chair color. It was a lot faster than taping off the spindles!
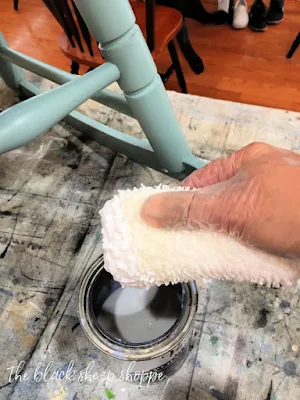
OK now it's time to seal the chalk paint. Normally I would wax the chair, but I injured my thumb (you might notice a bandaid in the photos), and needed a different method that was both quick and wouldn't require a lot of pressure to apply.
Polycrylic to the rescue! I dipped a sponge into the can of poly . . .
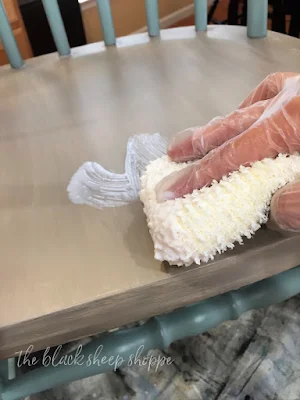
. . . then wiped the saturated sponge onto the chair. I continued to wipe until the sealant was smooth. I later gave it a quick sanding with 220-grit sandpaper to smooth it out even further.
And here's quick photo of the seat while the sealant is drying. The polycrylic finish isn't quite as luxurious feeling as wax, but it's still lovely. Keep scrolling for the final "after" photos!
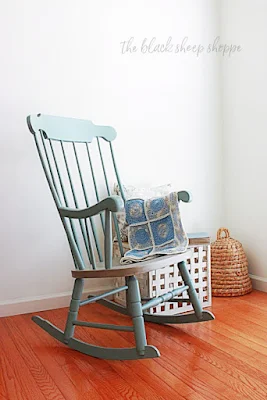
Can you believe it's the same chair? Even after all these year, it still amazes me how paint can totally transform a piece of furniture!
The new color scheme will work wonderful in either a baby's nursery or for a beach cottage style home.
There is a soft contrast between the seat and the rest of the chair.
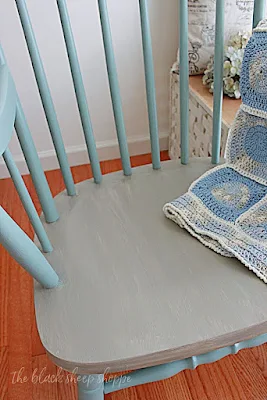
A closer look shows the subtle blended colors. Did you notice the blanket in the photos? I've revisited my love of crochet recently and spend time working on a variety of blankets. Be prepared to see more crochet projects on my blog!
Thanks so much for stopping by The Black Sheep Shoppe today!







Really like this, I have two chairs slightly different that I want to group with small table. This could bring it together but they both have cane seats. Have to figure out how to get that seat color on cane. Thanks.
ReplyDelete