If you read my article about my
Pretty Darn Good Kitchen Makeover, you'll remember that I didn't have enough time to paint the inside of the kitchen cabinet doors at my vacation rental condo. Instead I decided to go a different route to save both time and money.
Be sure to click the subscribe button if you enjoy this project and want to follow along for more home DIY projects and crafts. I send free periodic emails to subscribers, but don't worry it won't clog up your inbox! The emails are typically sent every one or two months. Still not sure? Click the Home tab at the top of your screen and browse through some of my other projects to see if we're a good fit before you subscribe. BEFORE:
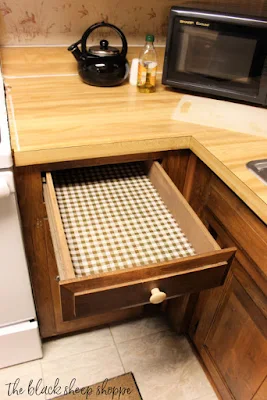
The kitchen is definitely being worked on in stages. This is what it looked like when we first bought the condo.
 |
| The original kitchen cabinets at my condo. |
My first order of business was to remove the old shelf liner paper and replace it with something new and fresh.
 |
| Removing the very old shelf liner paper. |
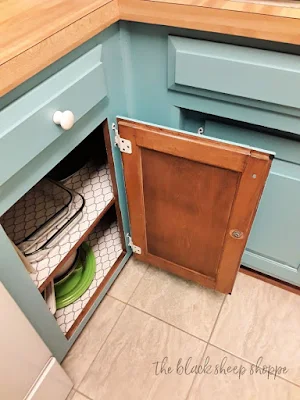
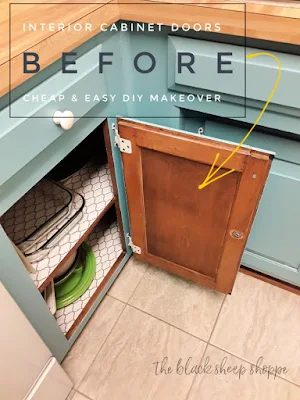
Fast forward a couple of years and it was finally time to paint the kitchen cabinets. As I mentioned before, there wasn't enough time on that trip to paint the interior of the cabinet doors. So today I will show you how I updated the cabinets in about an hour with only a few dollars spent.
 |
| I didn't have time to paint the inside of the doors. |
THE SOLUTION
Ta-da!
Chalkboard paper (affiliate link)! Honestly, I just love this stuff. It was a super easy project, gives a finished looked to the cabinets, and even better it is removable in case I want to update them differently in the future. The
Chalky Crown brand shown in the photo below also came with a chalkboard marker. The Chalky Crown had a protected covering over the top of the chalkboard which helps protect it during application.
I also purchased a roll of
Con-Tact Brand chalkboard liner and took it with me as a back-up. I ended up using it on the upper cabinets, so I'm glad I had extra. Both brands worked equally well. The Con-tact brand didn't have any protected liner on the top, but it still applied nicely.
Here's the process I used to complete the project: First measure the space.
 |
| First measure the cabinet door. |
Unroll the chalkboard paper and cut to size (bonus it has grid lines on the back).
 |
| Cut the chalkboard paper to size. |
The actual chalkboard paper is slightly offset from the backing which makes it easy to separate and peel away. If you've ever worked with paper that doesn't have the offset edge, you definitely appreciate this!
 |
| The offset edge makes the chalkboard paper easy to apply. |
I peeled back the top section of the chalkboard paper, lined it up, and then pressed it to the cabinet. Once I was sure it was relatively straight (if not then just remove and re-position), I peeled away the rest of the backing and smoothed it into place.
 |
| Line up the top and then secure the rest of the chalkboard paper. |
You know the saying, "measure twice, cut once"? Well I measured once and had to cut twice, ha ha. No worries, I just used a razor blade to trim off the excess.
 |
| Use a razor blade to trim if necessary. |
And then simply lift the excess away. Perfect fit.
 |
| Lift excess paper away. |
AFTER:
I used a
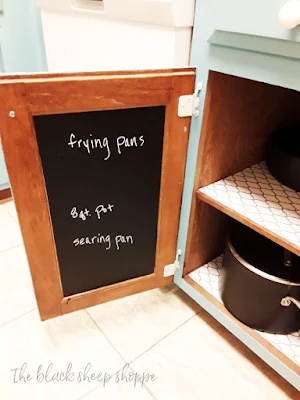
chalkboard marker to label what's inside the bottom cabinets.
 |
| Interior cabinets with chalkboard paper. |
Since the cabinets are deep it's helpful to see at a glance what is inside the lower cabinets. It saves having to do deep knee bends to find something in a kitchen that you're not familiar with (vacation rental).
 |
| Labels help you see at a glance what's in the cabinet. |
It also helps to quickly know where to return an item to.
 |
| Chalkboard labels help with organization. |
I was only going to line the lower cabinets, but I had enough paper with me to line the uppers, too.
Oh I also added a
Keurig to the kitchen as I think the younger generation appreciates that particular appliance. (We also kept the traditional drip coffee maker for the old-timers like me.)
 |
| Coffee station. |
I sprinkled a few fun and inspirational quotes throughout, too.
 |
| Add fun and inspirational text to your kitchen. |
Lastly, here's a view from the balcony which overlooks the Atlantic Ocean on Topsail Island, NC. It makes all the work worthwhile!
.jpg) |
| The view from the balcony of my vacation rental. |
I hope you enjoyed today's project. Thanks for stopping by The Black Sheep Shoppe!


.jpg)


Great idea with the chalkboard paper. I love that stuff.
ReplyDeleteThanks so much Pam!
DeleteBeautiful!! Would love to know where to ck on your rental please.
ReplyDelete