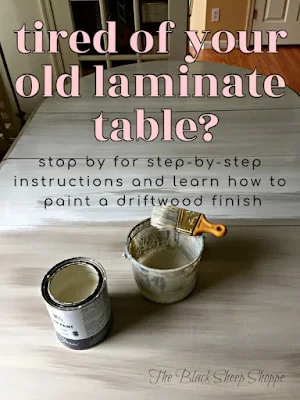
Don't let a cheap looking piece of laminated furniture scare you. Instead snatch it up and transform it into something beautiful! Today I will share how I created a driftwood finish on top of this laminated table.
By the way, the color scheme I chose for this set is the same as what I used for the
Changing the technique changes the results of the final finish. Keep reading . . .
 |
Duck Egg Blue Color Scheme
|
 |
| Laminated table top before painting. |
.
The table set is from 1987. The chairs and the edging around the table top are solid wood, but the top is a laminated press-board. Overall the set is in good shape for its age, but the spindles on one of the chairs was loose.
 |
| Easy repair for loose spindles. |
I squirted some
wood glue into the holes, wiped the excess glue away with a damp paper towel, and pushed the spindles back in place. I
clamped the chair and let the wood glue dry for about 12 hours.
 |
| Fixing loose chair spindles. |
With repairs out of the way it's time to start the fun part. Instead of a solid color on the table top I wanted to give it a faux driftwood finish. I get asked a lot about painting over laminated surfaces, and the answer is YES it's do-able. I find chalk paint (the original brand by Annie Sloan) works the best for me.
I started with a very thin and light base coat of Country Grey. I brushed it on with my
favorite paint brush that I use with chalk paint. I painted against the grain (there isn't actually a grain since it's a faux finish to begin with). By the way, links to products in this article are affiliate links to
products that I actually purchased and use. Don't worry it won't cost you extra.
 |
| Yes you can paint laminate. |
Applying a thin base coat will not only cover the original finish, but it will also create a slight texture for the other coats to cling to. Don't worry though, the final finish will be beautifully smooth. I let the base coat dry and cure overnight. I inserted the table leaves while painting so it would have a cohesive look when finished.
 |
| Apply a thin base coat. |
I used a damp paint brush to apply the second and following coats of paint, but this time I painted with the grain. Using a damp brush thins out the paint. This is important because I will be applying multiple coats. My second coat is Coco.
I didn't worry about getting full coverage with any of the coats, as the beauty of this finish will be subtle color and texture.
 |
| Brushing against the grain. |
The next coat is Old Ochre followed by a coat of Old White as shown in the photo below. I finished the table top with another coat of Coco and a final coat of Old White. That's a total of 6 coats of paint. It sounds like a lot of work, but it actually goes on quickly. The time consuming part is waiting for the paint to dry, so I used my hair dryer to speed up the process.
 |
| Multiple thin layers of paint. |
Before we get to the final reveal, let's talk a minute about the chairs. They aren't featured too much in this project, but they took the most amount of time to paint. One chair isn't too bad, but four chairs are a lot of work! I started with a base coat of Country Grey and then a second and final coat of Duck Egg Blue. I find the
vintage effects paint brush perfect for painting chairs. The angled tip easily gets into the nooks and crannies around the spindles and the flat side of the brush is perfect for painting the spindles.
 |
| Layered paint finish on chairs. |
My wax brushes were worn down to nothing but stubs, so I ordered a new set. Brand name brushes weren't in my budget, so I had to buy a cheaper set.
This set included a variety of sizes which turned out to be a huge bonus for waxing the chairs.
 |
| Variety of wax brushes. |
I used the larger brush on the most of the chairs, but the
small brush came in especially helpful when waxing between the spindles. Previously I would have used a cloth to get the wax in between, but the small brush was easier and I think used less wax overall.
I thought the set of brushes were going to be a disappointment, but now that I've used them I am hooked and so glad I didn't spend extra money on a more expensive set. The quality is good, but the range of sizes is the real game changer. I've been able to speed through the waxing process more quickly and use less wax overall.
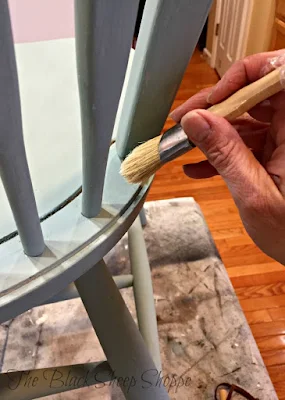 |
| Sealing chalk paint with wax. |
AFTER:
My studio is crammed with furniture, so I was a bit tight on space for taking photos. Nevertheless, here is the final set with its new finish.
 |
| Driftwood finish on table and chairs set. |
The driftwood finish on the top is subtle, but I think it adds something extra special instead of just a solid color.
 |
| Subtle driftwood finish on table. |
It's not easy to get the camera to focus in on the lighter finish, so I took some different angles and close up shots to try to capture the painted driftwood effect.
 |
| Painted driftwood finish on table top. |
 |
| Three paint colors used to create a driftwood finish. |
I used a layered paint technique to create a distressed finish on the table edging. No sanding required.
 |
| Layered painted distressed finish. |
The neutral driftwood color coordinates well with a variety of colors.
 |
| Neutral driftwood color scheme. |
No one will ever guess this was a thrift store find. The staging props are thrift store finds, too.
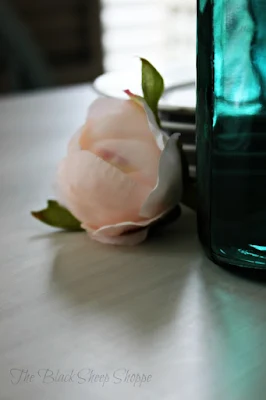 |
| Painted thriftstore table. |
I think this might be the best photo that shows the original texture created by the base coat going against the grain. I hope you can see it in the photo. I put three coats of sealant on the table top for extra protection.
 |
| Close up of texture created with paint. |
I also put extra coats of wax on the chairs. But they will eventually distress themselves naturally over time especially if they get heavy use. If you don't care for a distressed finish on dining chairs then I recommend using chair seat pads.
 |
| Painted chair. |
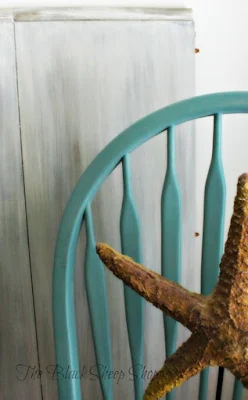 |
| Duck Egg Blue chalk paint by Annie Sloan. |
And a few final photos from a different angle. Like I said, my studio is crammed with furniture, so you might notice the
Faded Grandeur Dresser in the background. I need to get busy moving furniture to my booth!
 |
| Thriftstore table transformed with paint. |
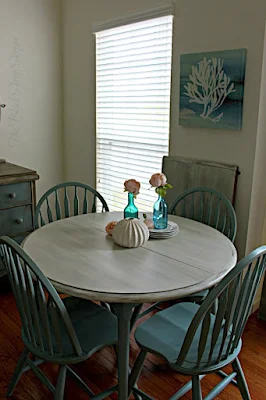 |
| Casual coastal color scheme. |
 |
| Chalk painted table and chairs. |
The customer who purchased the table set was kind enough to send me a photo of the table set up in her home (and also gave me permission to share the photo). I think it looks darling!
 |
| The table set up in the customer's home. |
Thank you so much for stopping by The Black Sheep Shoppe today!
 |
| Goodbye laminate! Hello driftwood finish! |


What sealant did you use on the table? Thank you!
ReplyDeleteHi Michelle, I used General Finishes High Performance Top Coat.
DeleteDid you use a gloss or matt sealant?
ReplyDeleteI used a satin finish, but that is my personal preference. (General Finishes High Performance Top Coat.)
DeleteThey no longer make the vintage effects paint brush. Do you have a suggestion for a different brush?
ReplyDeleteThe Wooster Shortcut brush looks about the same as the vintage effects. I think they gave it a new name, but I have not tried it yet. But this will be what I order when I need a replacement. https://amzn.to/3x1KU1I
DeleteCan you do the same on a wood table?
ReplyDeleteYes you can apply the same technique to a wood table. Good luck with your project!
DeleteI love this.look and.im going to try it on a mirror. Thank you for the inspirstion.
DeleteThank you and good luck with your project!
DeleteI love this look and to know this was over laminate. Great inspiration piece for me. Thank you!!
ReplyDeleteThank you Cheryl for your kind words!
DeleteDid you apply a varnish or poly acrylic over the end results?
ReplyDeleteI applied three coats of General Finishes High Performance Top Coat. It is a polycrylic sealant.
Delete