This is the guest bathroom in my vacation rental condo located ocean-front in North Topsail Island, North Carolina. There are so many updates needed throughout the condo, and we tackle the projects as time and money permit. The guest bathroom hasn't been a main priority yet, but I knew that a little bit of paint could make a big difference!
 |
| Small budget. Big difference. |
After painting the kitchen cabinets (
you can see that project HERE) I had a good idea about how much time this project would take me. So on my next visit I brought some paint and supplies with me.
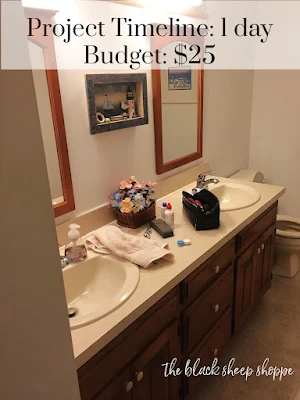 |
| Bathroom refresh for $25 in one day. |
I switched out some of the art work on the walls, but otherwise at this point the only change is the painted vanity and mirror frames. Wow what a difference!
 |
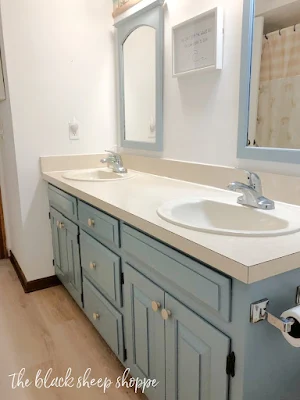
| Painted vanity in guest bathroom. |
I haven't finished the room just yet. I still need to make some changes to the walls such as removing the wallpaper behind the light fixtures.
 |
| Painted double vanity. |
HOW MUCH DID IT COST?
Normally a quart of
this paint runs about $40, but I waited for a sale and bought it for $25 (plus some change, i.e tax and shipping). The rest of the supplies I already had on hand leftover from the kitchen project.
If you use this particular paint, then I do recommend also purchasing the no-rinse
deglosser and
open cell foam rollers. It will cost an extra $20 or so, but in my opinion it is worth it to get the best results. I also had on hand a paint roller tray, a
basic 4" paint roller, and a paint brush.
PROJECT TIMELINE:
It took me one day to complete the project. In the morning I removed the doors and cleaned all the surfaces with the deglosser. Once it was dry I applied the first coat of paint. In the afternoon I applied the second coat of paint. The paint has a built in primer and top coat so that really sped up the process. I reattached to doors the following morning.
I applied the paint with my 4" roller to get good coverage and then GENTLY rolled the
open cell roller over the wet paint surface. This process smooths out the paint for a beautiful and professional looking finish. I didn't paint the interior of the doors, but if it's your first time using the paint, the inside of the doors is a great place to perfect your technique.
(Side note: I didn't use a primer on this project since it's already built into the product. However, when I use white paint I typically start with a base coat of primer just to cut down on the number of coats of paint.)
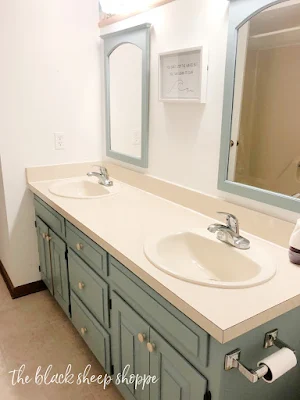 |
| The painted vanity brightens up the room. |
I think the fresh new color really brightens up the room. The color I used is
Irish Garden which is described as a blue-green. I am not sure how it looks on various computer screens, but in person I think it looks more blue in this space. It's a perfect color for the beach!
 |
| Refreshed bathroom vanity with paint. |
NEW FLOORS INSTALLED!
We continue to chip away at the projects. I painted the vanity in 2021 (I can't believe I am just now getting around to writing about it!). Fast forward two years and it's finally time to upgrade the floor.
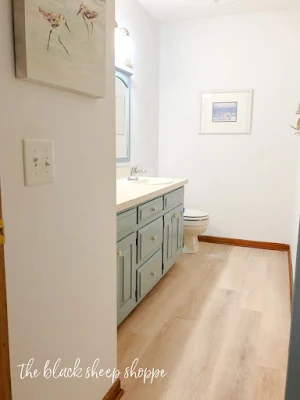 |
| New LVP floor in guest bathroom. |
My husband installed a vinyl plank floor in both the bathrooms on our last visit.
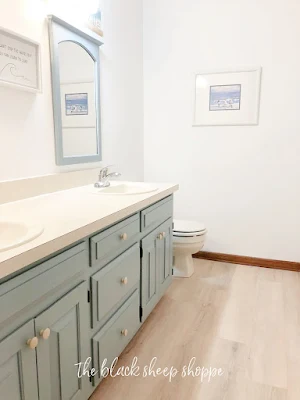 |
| Painted vanity and new floor. |
The color tones are very similar to the old vinyl floor. But the new floor is a little brighter, looks so much more modern, and feels better underneath my feet.
 |
| New plank floor in guest bathroom. |
I hope you enjoyed seeing the results of the painted vanity. Thank you for stopping by The Black Sheep Shoppe!
 |
| Before and after guest bathroom. |
FUN FACT: As I was preparing the photos for this article, it reminded me that the painting you see in the background is the same one I used as inspiration for the color palette when I painted a pair of vintage nightstands many years ago!
You can see that project HERE! I wish I hadn't sold the nightstands because they would look amazing in my condo, but it gives me some inspiration to look for a new set to work on.
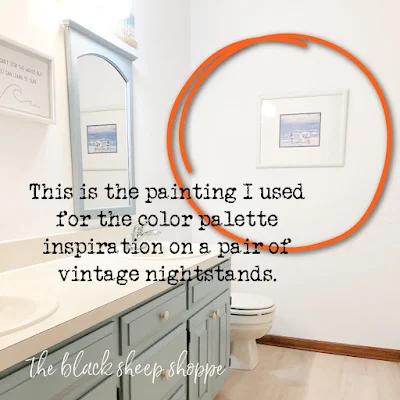 |
| Painting for color palette inspiration. |




Comments
Post a Comment
Select the NOTIFY ME box to receive a notification of a reply to your comment (yes, I do try to acknowledge all comments). There might be a publishing delay on older posts as they are moderated to reduce spam.