DIY Scrap Wood Sign
This is a great project to use up leftover scrap wood. It's easy to make and customize for whatever type of wood scraps you have available. It makes a wonderful gift or keep it for yourself!
Supply List:
- Scrap wood,
- Paint,
- Brush / Roller,
- Extra scrap wood for frame (optional),
- Hairdryer (also optional; used to speed up the drying process),
- Stencil or Vinyl Decals*
*For this project I used my Sihloutte Cameo cutting machine to cut out vinyl decal stencils. Don't be discouraged if you don't have a cutting machine! I've included links at the very end of this article for 3 of my most popular projects using store bought pre-cut stencils.
I started with a piece of leftover beadboard paneling. The scrap piece I am using is in good shape, but there were some scuff marks which I needed to cover.
 |
| LEFTOVER SCRAP OF BEADBOARD PANEL IS BASE FOR HOMEMADE SIGN |
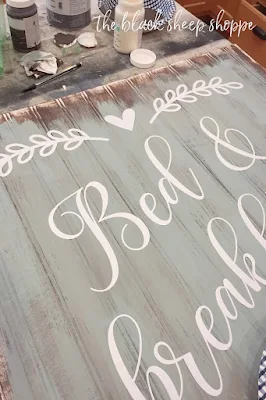
I used my hairdryer to speed up the drying process. Once the first layer of was dry, I lightly applied a coat of blue over the brown paint.
Next I applied vinyl decals that I cut from my Sihlouette machine onto the painted beadboard. The vinyl stuck well to the flat surface, but I wasn't sure how well the vinyl would hold up over time since it didn't make contact over the grooves. So at this point I decided to slightly change the direction of the project.
 |
| APPLY VINYL DECALS |
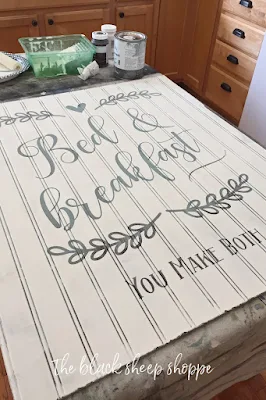
I rolled a coat of white paint over the entire board including the vinyl letters. The colored background will now become the color of the text.
 |
| ROLL PAINT OVER VINYL STENCILS |
 |
| SCRAP WOOD SIGN READY FOR FRAMING |
MAKE SIGNS USING PRE-CUT STENCILS:
Please visit the following articles if you're interested in learning how to make signs using pre-cut stencils,


Comments
Post a Comment
Select the NOTIFY ME box to receive a notification of a reply to your comment (yes, I do try to acknowledge all comments). There might be a publishing delay on older posts as they are moderated to reduce spam.