Vanity painted in Duck Egg Blue & Old White
PREP WORK:
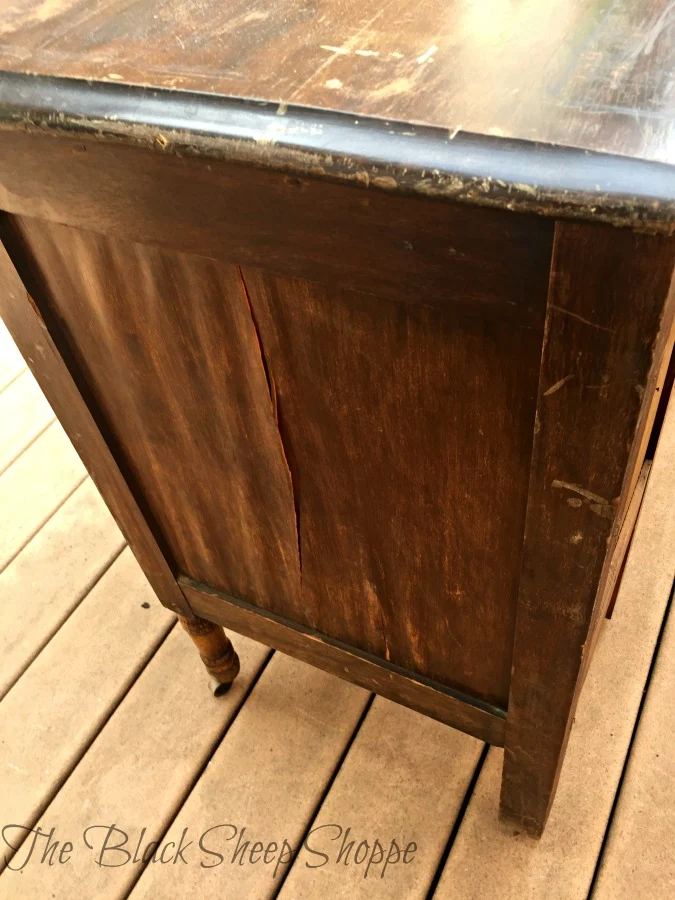
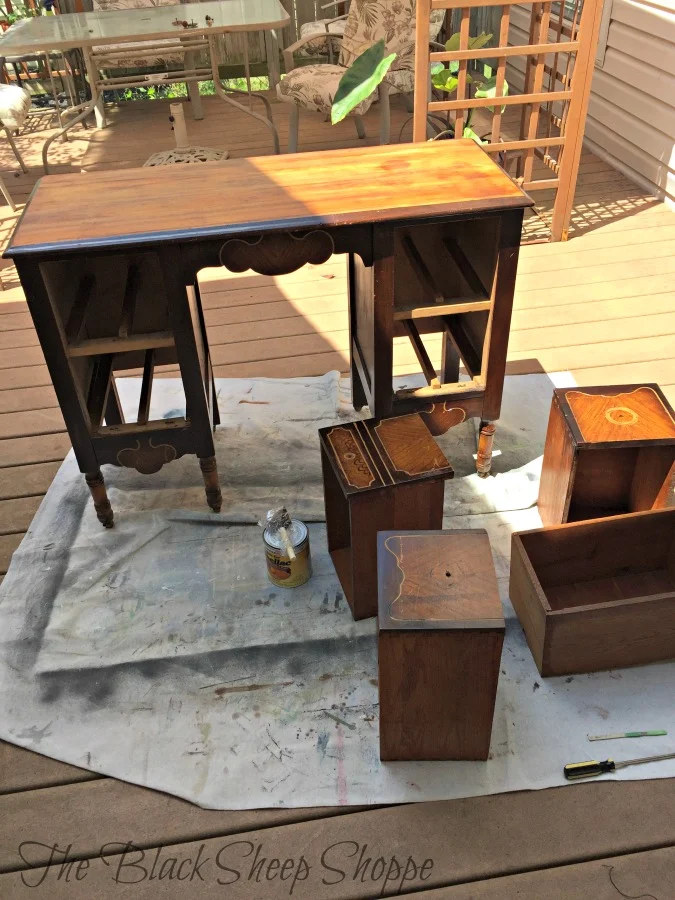
There wasn't one area of the finish that didn't need a little love. The top was in especially bad shape so I elected to sand it a bit prior to paint. Not shown in the "before" photos is the coordinating mirror. You'll see that in a bit in the "after" photos.The wood veneer on one of the side panels was heavily damaged. The veneer was loose, so it was easy to tear it off and paint over the unfinished wood beneath it.
Sometimes the tannin in the wood will bleed through the painted finish. I don't always know when this will occur, but I was pretty certain it would happen with this piece. So prior to applying paint I applied two coats of clear shellac. I used a foam brush to apply the shellac and let it dry between coats. The shellac dries fairly quickly and acts as a sealant.
AFTER:
The color scheme I chose for this piece is Duck Egg Blue and Old White. My can of Duck Egg was running very low, so I only used one light coat over the entire vanity and mirror. The one coat worked well for a worn distressed finish. For a less distressed finish a second coat would be necessary.The top looks so much better after sanding and a coat of paint.
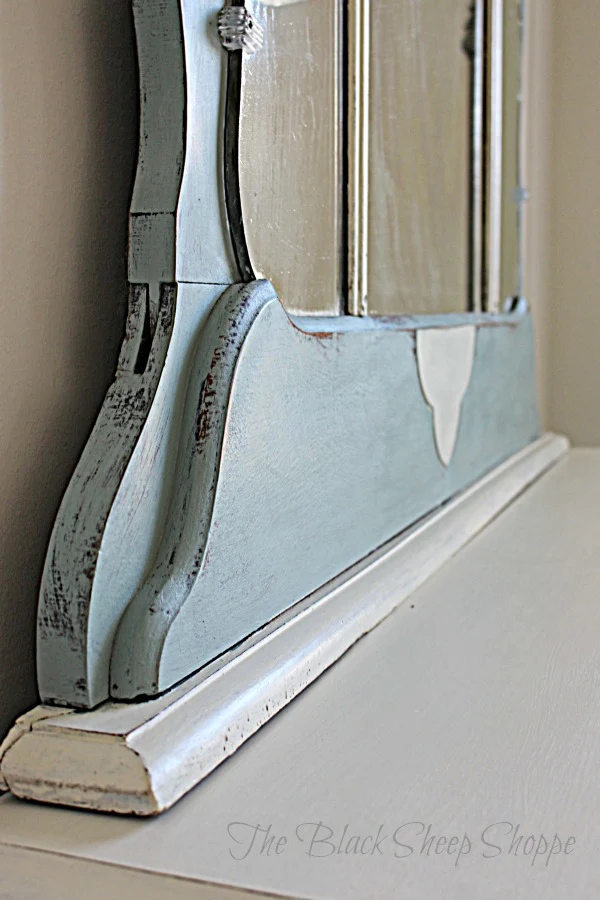
The rest of the vanity has dings and dents here and there, so I added distressing to the painted finish to continue with the theme of the vintage finish.
Mirrors are always a bit tricky to photograph, but here are a few photos of the details on the mirror frame.
 |
 |
PHOTOGRAPHY STAGING PROCESS:
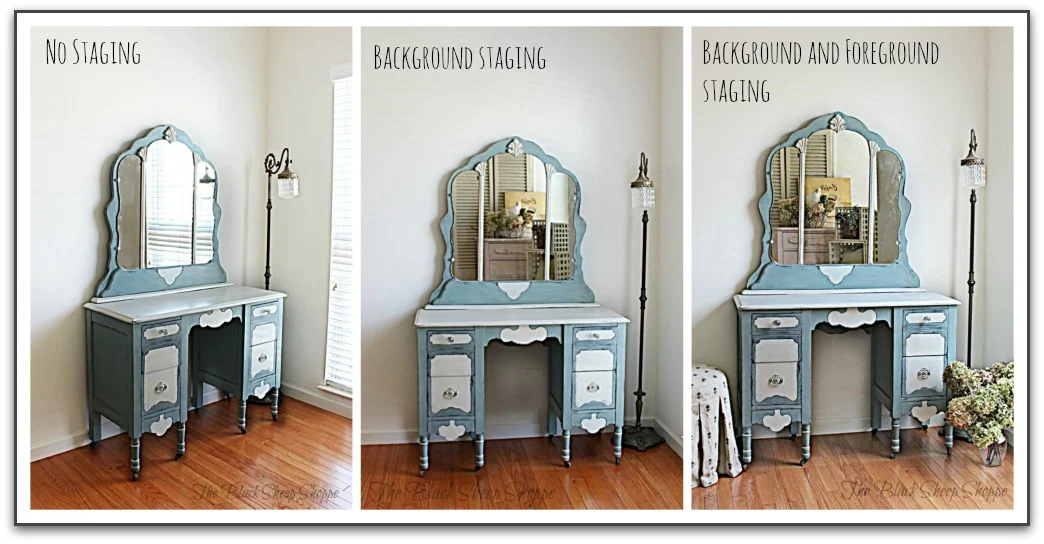
Below is the vanity without any photography staging. The next few photographs illustrate the process of how the staging evolved. I'll include a side-by-side comparison at the very end of this post.Rather than staging the vanity itself, I first added staging to the background which is picked up in the reflection of the mirror (I used the same backdrop for the vanity in my last post).
It's not a bad shot, and I wanted to keep the staging simple to let the vanity be the star of the photo, but I felt it was a little flat. So I added some flowers and a vanity stool in the foreground to add a little dimension to the photo. I kept the vanity free of props for an uncluttered look.
Thank you for stopping by The Black Sheep Shoppe today. I hope you enjoyed today's project.
Supply List:
Affiliate links are included in the supply list.- Chalk Paint by Annie Sloan Duck Egg Blue and Old White I think the small project pot size for both colors of paint MIGHT be enough for a light one coat finish, but it will be close. Get the quart size for full coverage. I always buy the quart size because it's more economical in the end and I always use the leftover paint for other projects.
- Shellac and foam brush
- Sandpaper
- Orbital sander
- Wooster Vintage Effects brush
- Wax brush
- Lint free cloths (for removing excess wax and buffing)
 |
| Photography staging process. |


Comments
Post a Comment
Select the NOTIFY ME box to receive a notification of a reply to your comment (yes, I do try to acknowledge all comments). There might be a publishing delay on older posts as they are moderated to reduce spam.