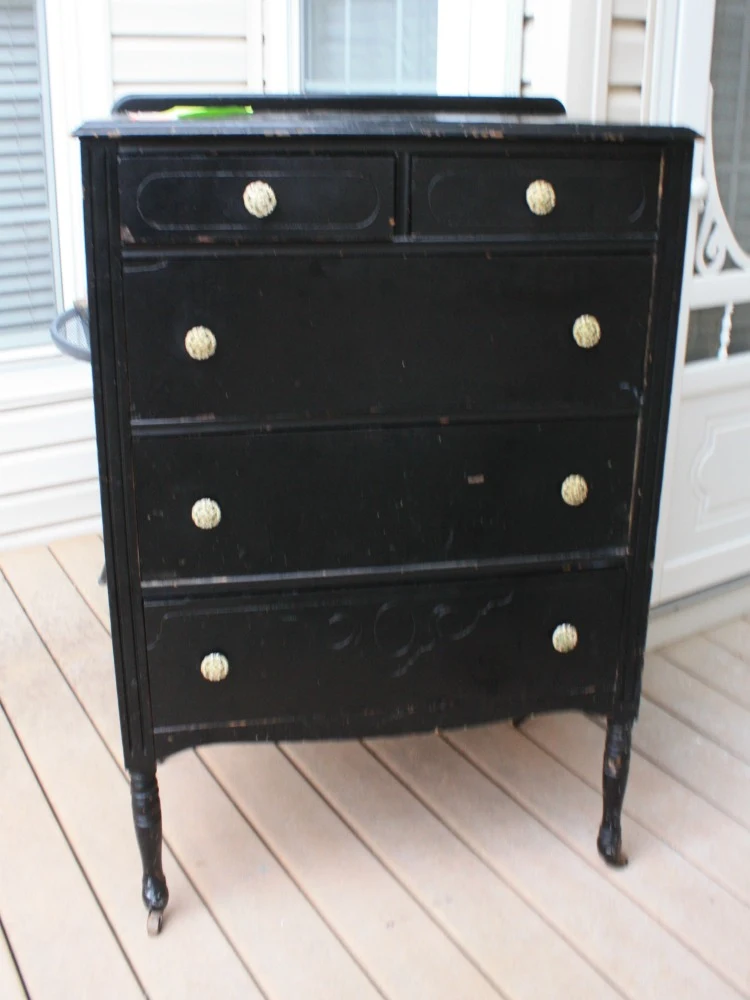
I found this 1920's dresser at a thrift store. It's one of my favorite styles and has three large drawers as well as two small drawers. The knobs were not original and there was a lot of surface damage, which is probably why someone painted it years ago.
 |
| Peeling and chipping paint must be removed |
During
Normally you don't need to remove paint prior to applying chalk paint. However, the black paint was chipping and flaking in many areas, and I wanted a good foundation to apply my paint to, so I decided to strip the dresser first. I avoid chemical strippers whenever possible because I don't like the gooey wet mess. I used an orbital sander and a mouse sander to remove the paint. Although the sanding dust is messy, it was easily cleaned up afterwards with a broom. Plus the sanders make a quick job of it. Be sure to use a sanding mask and protective eye glasses.
 |
Remove paint quickly with an orbital sander.
I used a mouse sander on the smaller areas. |
Once the paint was stripped away I applied two coats of shellac to prevent the tannin from the bare wood from bleeding through the paint.
 |
| Apply shellac to prevent the tannin in bare wood from bleeding through. |
After applying the paint and distressing the finish with sandpaper, I sealed the finish with soft clear wax. A little wax goes a long way! Simply dab a small amount on a wax brush and brush it on then spread it evenly over the painted surface. Wipe away excess wax with a lint free cloth.
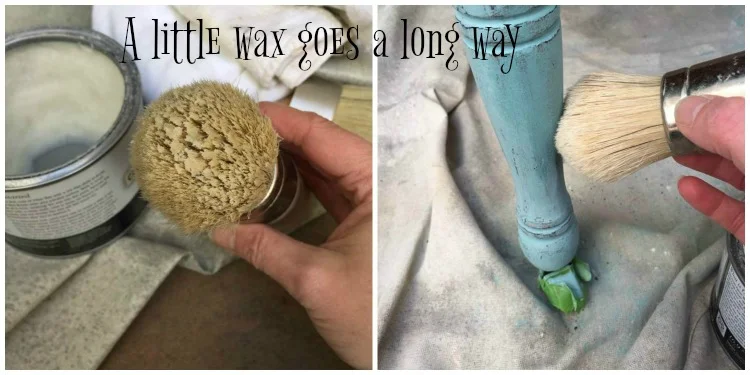 |
| Seal chalk paint with clear wax. A little goes a long way! |
The interior of the drawers were in fairly good shape considering its age. However, the wood was dry and scratched. I used Restore-A-Finish to recondition the drawers and then applied beeswax conditioner.
 |
| Recondition dry interior drawers. |
After
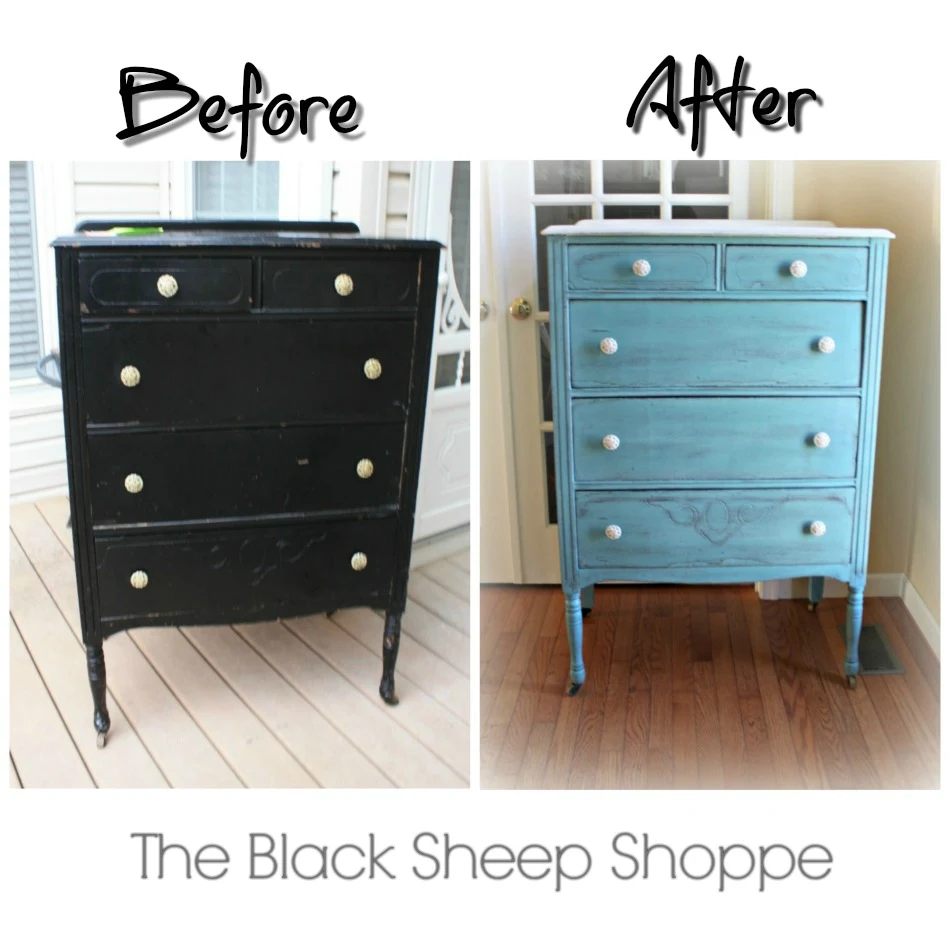
I wanted to give the dresser a bright and cheerful finish, so I painted the base of the dresser in Provence blue.
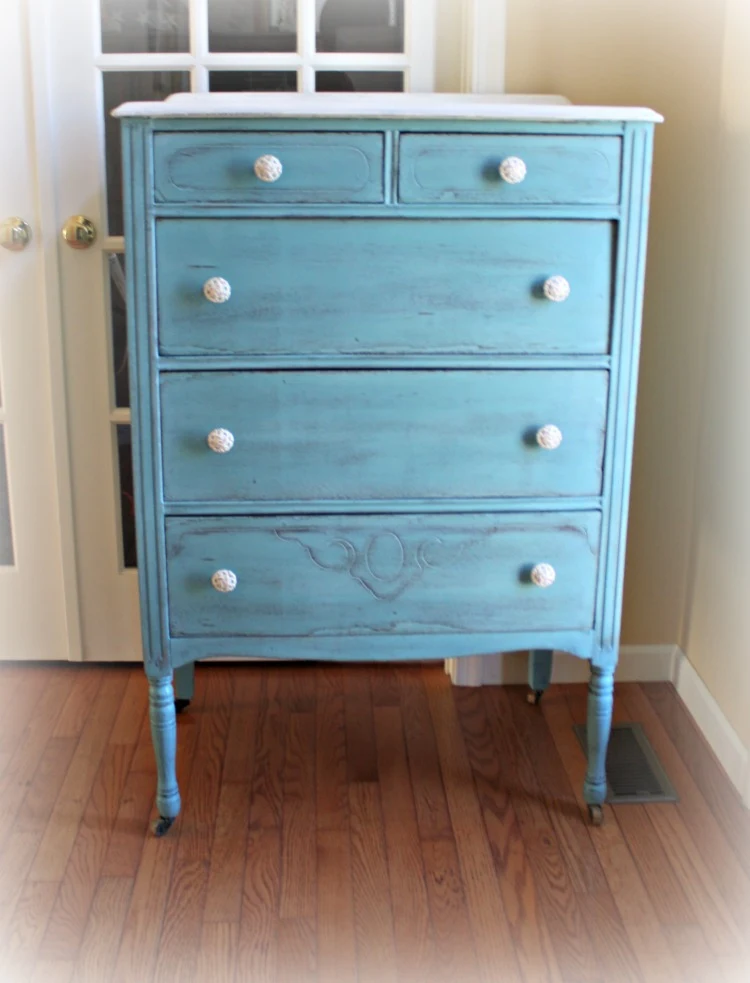 |
| 1920s dresser painted in Provence blue and Old White. |
The dresser top and the knobs are painted in Old White. I sanded the paint back to allow the wood underneath to peek through which gives it an old farmhouse style.
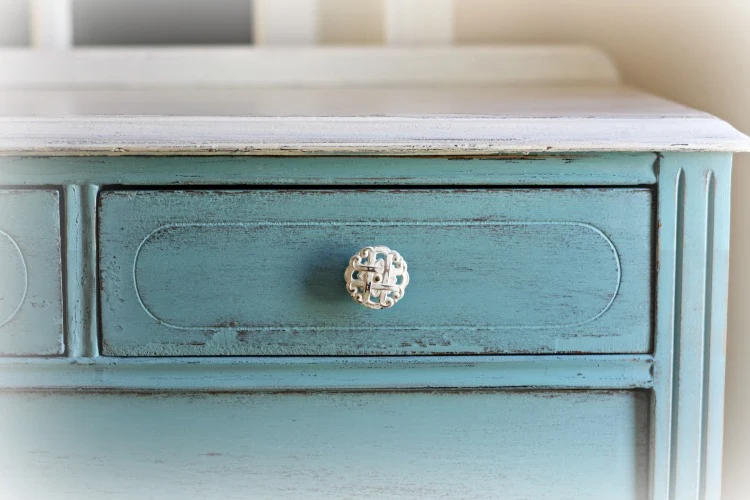 |
| Sand back the paint to almost a bare finish for a worn farmhouse look. |
I made some repairs to the veneer, but left other areas chipped and worked that into my design.
 |
| Damaged areas can be incorporated into the design. |
Sometimes the damage looks out of place, but other times it gives a little history and charm to the piece.
 |
| The wear and tear through the years can be charming. |
 |
| The dresser sits on the original wood wheels. |
The dresser sits on its original wood wheels.
 |
| Vintage wood wheel |
And finally, here are a couple of shots of the "before and after" for comparison.
Thanks so much for stopping by today! I wish you all a very happy, safe, and prosperous New Year.
Supply List (some links are affiliates)
- Orbital sander and variety pack of sand paper (60, 80, 100, 150, 200-grit). The paint on this project was tough to remove, so I switched to 40-grit sandpaper and then worked progressively up to 220-grit for a smooth finish. Alternatively you could use CitriStrip to remove the finish.
- Mouse sander used to reach the spots too tight or small for the orbital sander.
- Wood filler for repairing broken veneer
- Shellac and disposable foam brushes brushes
- Chalk Paint by Annie Sloan: Provence blue, Old White, and soft clear wax.
- Small wax brush I have both a small and large wax brush, but if I had to choose only one I would go with the small brush. If you do a lot of projects then it's worth the investment to have both sizes.
- Restore-A-Finish and Feed & Wax (for drawer interiors)





Comments
Post a Comment
Select the NOTIFY ME box to receive a notification of a reply to your comment (yes, I do try to acknowledge all comments). There might be a publishing delay on older posts as they are moderated to reduce spam.