Easy Rustic Country Sign
Today's post is about how I re-purposed an old window screen into a rustic country sign. This is a fun and easy project that can be customized for a variety of purposes. The screen I used for my project is large and measures approximately 55" high x 34" wide. But any size screen would work.
Getting Started
First clean the screen with soap and water. After it's dry apply a coat or two of shellac with a foam brush to both the frame and screen to provide a sealed base coat to work on. (If you're using a newer and/or cleaner screen you might be able to skip the shellac. The screen I was working with was very old.)Next I painted the front and back of the wood frame. I used two coats of Chateau Grey chalk paint. The chalk paint doesn't require stripping the old paint nor does it require a primer coat, so it was perfect for this project.
I taped off the window frame and then lightened the screen by dry brushing it with Country Grey paint. I kept the brush strokes random since I was planning for the finished project to look aged and rustic.
Next, I lightly aged the frame and screen with a decorative glaze (Rustoleum Transformations in Java Brown). I used a foam brush to apply the glaze and used a damp paper towel to wipe off the excess. I didn't take photos of the glazing process, but if you want to learn more about it then check out my other post HERE.
I sanded the frame to give it a worn and rustic feel and sealed it with soft clear wax. (If you're finished project will be hung outdoors then use polyurethane instead of wax.) Here's a close up of the project at this point. I was outside in bright light, so the color is a bit off. The frame is actually a little greener that was is shown here.
Adding the Design
I chose a Victorian Bed & Breakfast sign that I found online. I used PowerPoint to enlarge the image. After I had the first portion enlarged to fit one page, I copied it to a new slide and then cropped it for the second portion. I repeated the process until I had four slides.I printed the image onto four 4 sheets of standard 8 x 10 paper.
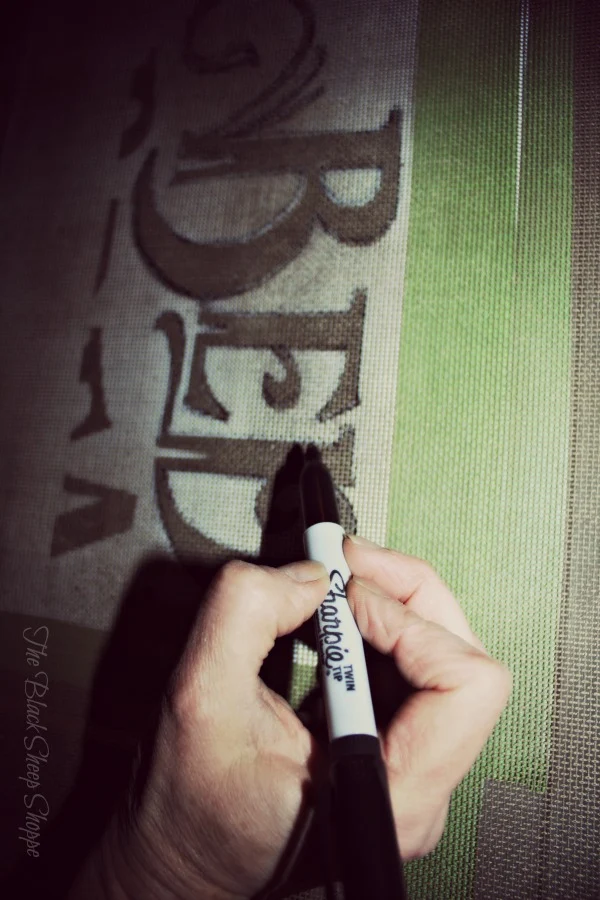
I taped the paper to the back of the screen and then traced an outline of the letters with a fine tip Sharpie permanent marker. Make sure you have your work surface protected just in case any of the marker bleeds through the paper.
After I finished tracing the outline I used a thicker chisel-tipped Sharpie to fill in the letters. I turned the screen upside down for this step because it was easier for me to reach.
There were some areas on the screen where the shellac had covered some of the holes and dried which made it look like little dots within the letters. I gently pushed a tooth pick through the dots to break through the shellac. Problem solved.
I repeated the same process for the bottom portion of my sign.
Finally, I lined the back with burlap fabric and attached it with a staple gun. This step isn't necessary, but it does provide a more finished look to the project.
Here's a side-by-side photo of the before and after:
I hope you were inspired to give this project a try. Thanks for stopping by!


Fantastic job!
ReplyDeleteThank you Diane!
DeleteFantastic job!
ReplyDeleteCool!!!!!
ReplyDeleteThank you!
DeleteLove this ! Thanks for sharing !!
ReplyDeleteThank you!
Delete