Sell Your Painted Furniture. Part 1: Studio Set Up
Speaking of professional photography, let's just say upfront that I am NOT a professional photographer. But I have sold hundreds of pieces of furniture, and my experience has shown me that great photos sell the furniture faster and for more money. So if you're just getting started in a side hustle to sell painted furniture, or if you've been at it for a while but are looking for better sales, then keep reading.
CREATE A STUDIO SPACE
Not everyone, including myself, has an ideal studio space. So get creative and do the best you can working with the space you have. Ideally your space will include:
- a large blank wall, preferably white
- solid surface floor
- uncluttered background
- plenty of natural light
For years I used whatever space I could find, but eventually I carved out a small space in a study. My husband used part of the space for his office, so I only had about a 6' x 8' area to work with. I could easily move the existing furnishings whenver I needed to photograph my painted pieces. I keep a supply of furniture sliders on hand and also use old towels to slide furniture around on the hardwood.
I was lucky the space had hardwood flooring. But what if the only space you have has wall-to-wall carpet? Don't rip it out! Either work with it, or purchase some snap and click vinyl plank flooring to create a temporary floor space for when you need it then put it in storage when it's not in use. Or use a large neutral area rug that coordianates with the style of your furniture.
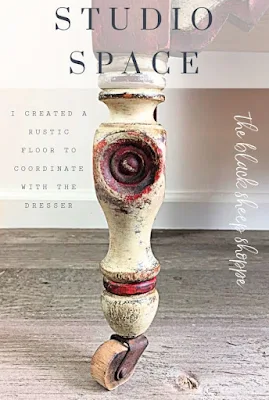
I wanted a rustic floor to coordinate with this very rustic dresser. I simply laid down planks of barnwood flooring to create the look I wanted. Afterwards I turned the barnwood planks into signs and sold them for a profit.
Inexpensive wall panels can be used to create an uncluttered backdrop. You don't need to attach the panels to the wall. Instead prop them up and add some baseboard moulding to give it a finished look. Then put it in storage when it's not in use. (I'm planning this now to set up a studio in a garage. Stay tuned for updates!)
If you don't have plenty of natural lights, consider investing in an inexpensive photography light kit. I don't use my kit for every photo shoot, but they sure come in handy on gloomy days, especially in the winter.
For me it has been trial and error. Mostly error, ha ha! I cringe a little looking back at my old photos, but that is how we learn. Here's an example of a side table I painted and photographed both with and without a studio space. Yes, it IS the same table! I initially painted it black, but it didn't sell. I thought maybe the color was holding it back, so I repainted it. At the same time I created my first studio space and took new photos. I increased the price and it sold within a day.
And don't worry if you don't have the perfect studio space. Do the best you can, learn as you go, and make improvements when you can. Here's an example of a pair of nightstands. The first photo doesn't have a neutral backdrop wall. And yet it's not a bad shot. The second photo shows the nightstands photographed against a neutral, uncluttered wall.
Here's a couple of behind the scenes photos of my studio:


Helpful Thank you
ReplyDelete