Blog Post #299: Re-Purpose a Broken Mirror
A broken mirror doesn't have to mean seven years of bad luck. At least I hope not, because this vintage mirror was broken. Oops! I am using the wood veneer panel from the back of the mirror to try to turn my luck around.
First I played around with a variety of letter placements with the cut out shapes from my stencils. I used two sets of stencils for this project. First a lower case set of large stencils (8" x 8") and then a smaller set of uppercase letters (5" x 5"). Both are affiliate links to the stencils I actually purchased. They are made of chipboard and I've re-used both sets a number of times.
Once I was happy with my design, I removed the stencils and then painted the background a navy blue and then taped off a border and painted it white. I wanted a crisp and clean border, so first I sealed the edge of the tape with a light coating of acrylic gesso. It dries clear and prevents the paint from seeping under the tape. If you don't have gesso then mod podge or any type of glue or sealant that dries clear will work, too.
The result is a crisp and clean transition between the two colors of paint.
Since I am working on a larger sign I traced each of my letter placements with a pencil.
Tracing the letters first made it easier to line up the individual stencils later.
Next I got busy pouncing paint over the stencils. Initially I planned to add a drop shadow to the letters, but the black paint didn't pop against the navy background, so I decided to eliminate this step.
AFTER:
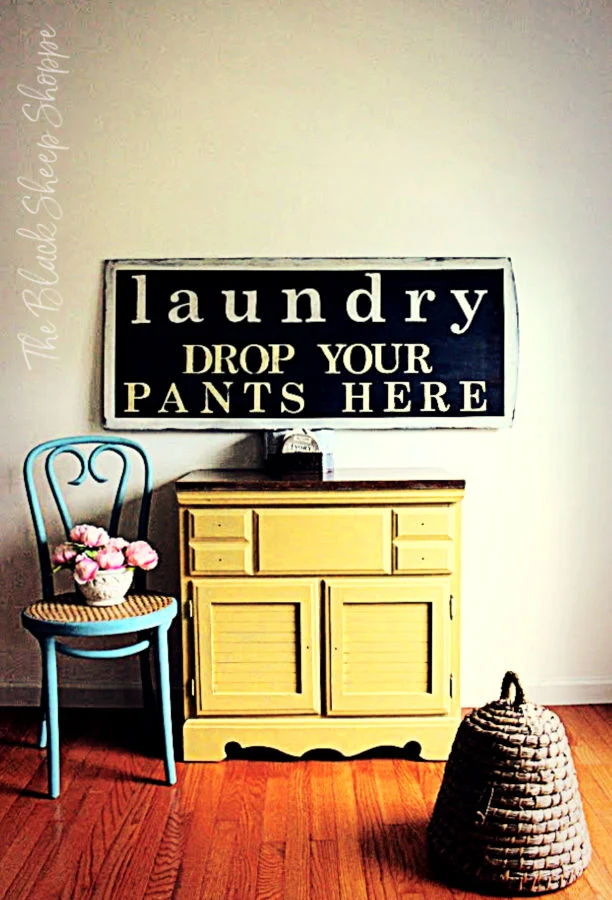
I still need to drill holes in the top of the sign and add a wire for hanging. So in the meantime I created a little staging vignette and propped the sign up on a couple of paint cans. The cabinet is still being worked on, so you'll see that in a future post.
I took a close up photo of the letter in an attempt to capture the details of the overall finish. The word "laundry" is stenciled with white paint, and the other words are painted in cream. I lightly sanded back some of the paint and then sealed the sign with clear wax, but an acrylic sealer would work well, too.
I hope you enjoyed today's project! Thanks for stopping by The Black Sheep Shoppe.


Comments
Post a Comment
Select the NOTIFY ME box to receive a notification of a reply to your comment (yes, I do try to acknowledge all comments). There might be a publishing delay on older posts as they are moderated to reduce spam.