Rental House Renovation: Part 3. The Reveal & Actual Costs
I would have liked to fully renovated the kitchen, but that didn't fit into the budget or timeline. Instead it was updated with cleaning supplies and paint. There is an access panel to the new shut-off valve behind the stove.
We added bi-fold doors to the laundry area after these photos were taken. The walls to the laundry were built out about 5 or 6 inches so it's now deep enough to hold a washer and dryer and close the doors. The new back wall hides the utility area which houses the furnace and hot water heater. There was a light on the utility side, so we added a new light on the ceiling of the laundry area. There wasn't access to the attic space, so we added an access panel in the hallway by the utility room.
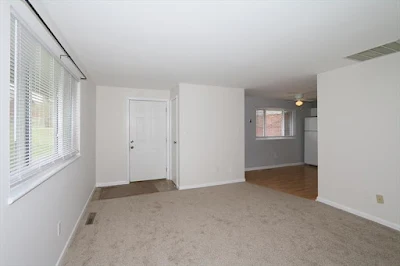
We did purchase new blinds for each window in the unit. The old ones were so dirty it just wasn't worth the time and effort to clean them. As a safety precaution I paid a little extra to upgrade to cordless blinds just in case the next tenants have small children.
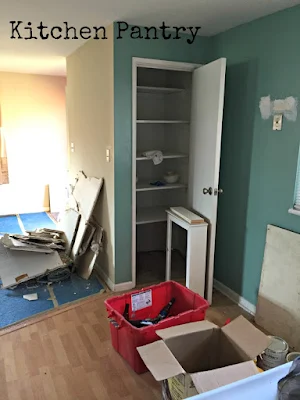
Even though the unit is small, it does have lots of storage, including a deep pantry with plenty of shelves.
We painted the front door and added a new handle and lock. We purchased a new storm door as the old one wasn't salvageable.
Updating the bedrooms and closets required extensive cleaning prior to painting. Each room required two coats of paint on the ceiling, walls, baseboards, and trim. We added new carpet and cordless blinds. We also replaced all the electrical outlets throughout the unit.
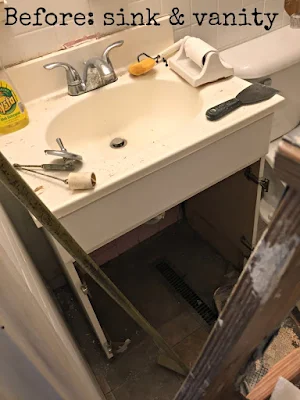
My husband did such a nice job renovating the bathroom! The renovation included new drywall throughout the room. The tub was professionally reglazed. We added a new vent fan, shower surround, and a new vanity. It's a small bathroom, so the vanity I choose was a little wider than the original plus it includes drawers for extra storage. I cleaned and painted the medicine cabinet / mirror. We also added new towel racks and a hook to the back of the door. We kept the existing flooring.
We kept the existing faucet. It had a few blemishes but otherwise was in good shape.
Exterior: This is a view of the front of the two-family house. The entrance to the back unit is through a breezeway in the carport.
 |
| Covered carport with entrance to back unit. |
Behind the carport is a patio and the main entrance to the back unit. The electrical boxes are a bit of an eyesore but could be screened off with a temporary free-standing trellis of some sort.
 |
| Large fenced yard. |
Costs of the Rental House Renovation:
Below are the costs we incurred for the entire project. It's not completely an organized list, but gives you the general idea.We considered just cleaning, painting, and getting new carpet. However, we wanted to make sure the unit was in tip-top shape as well as looking good, so we went ahead and made the improvements to the laundry area and renovated the bathroom. I think it brings in better tenants and adds value to the property, too.
| Paint, cleaning supplies | $297.35 |
| sanding sponge, copper pipe, faucet | $103.30 |
| paint supplies | $70.80 |
| return plumbing | ($12.58) |
| bath vanity | $233.78 |
| drywall, dumpster bag, paint & supplies | $162.12 |
| paint supplies | $52.55 |
| plumbing supplies, cleaning supplies | $14.83 |
| dumpster | $119.00 |
| electrical supplies | $16.48 |
| tub surround | $317.37 |
| return paint supplies | ($7.45) |
| carpeting | $1,053.56 |
| plumbing supplies | $40.37 |
| return tub glue | ($10.61) |
| plumbing supplies | $61.62 |
| blinds, stove parts | $193.59 |
| door lock, bath accessories | $48.98 |
| return drywall | ($17.86) |
| storm door, tub parts | $150.07 |
| light bulbs | $21.25 |
| return door closer | ($10.65) |
| Contractor: Laundry room | $987.00 |
| Contractor: refinish tub | $379.00 |
| cleaning supplies | $8.48 |
| plumbing connections, supplies | $35.40 |
| joint tape, cleaning supplies | $17.59 |
| joint compound | $9.60 |
| Grand Total: | $4,334.95 |


Wow! Beautiful transformation! :) Nice work.
ReplyDeleteThank you so much!
DeleteWow, Patricia this is the best tutorial i have ever read on hometalk.com ! It was so thorough and great pictures to go along with each step. Every step was clear and concise and your list of supplies and costs was very eye opening as far as price, supplies and the amount of work that goes into each step in making a home clean and liveable and saleable. Even though I've done several myself, I've never laid out each step so clear. I found your post very enjoyable to read and congratulations on your Sale. Hope you had a wonderful and well-deserve dinner out. Your husband and son-in-law deser7a round of applause, what a great team !
ReplyDeleteThanks so much Diena! It was overwhelming at first, but after we laid out the steps and rolled up our sleeves it seemed more manageable. We were lucky that we didn't run into any unexpected major repairs (which always seem to happen on the TV house flipping shows).
Delete