I took a trip out of town to northwest Ohio to pick up a table and stopped in a local thrift store while I was there. I found this lovely antique two drawer dresser. I also spotted a couple of other pieces that I wanted, but there was no room in the SUV for everything. Unless I left some people behind and then all would have fit. But I couldn't do that, so I had to narrow down my choice to one item, and I decided on the dresser. As a side note, click on the
HOME tab at the top of the page to view more projects.
Before
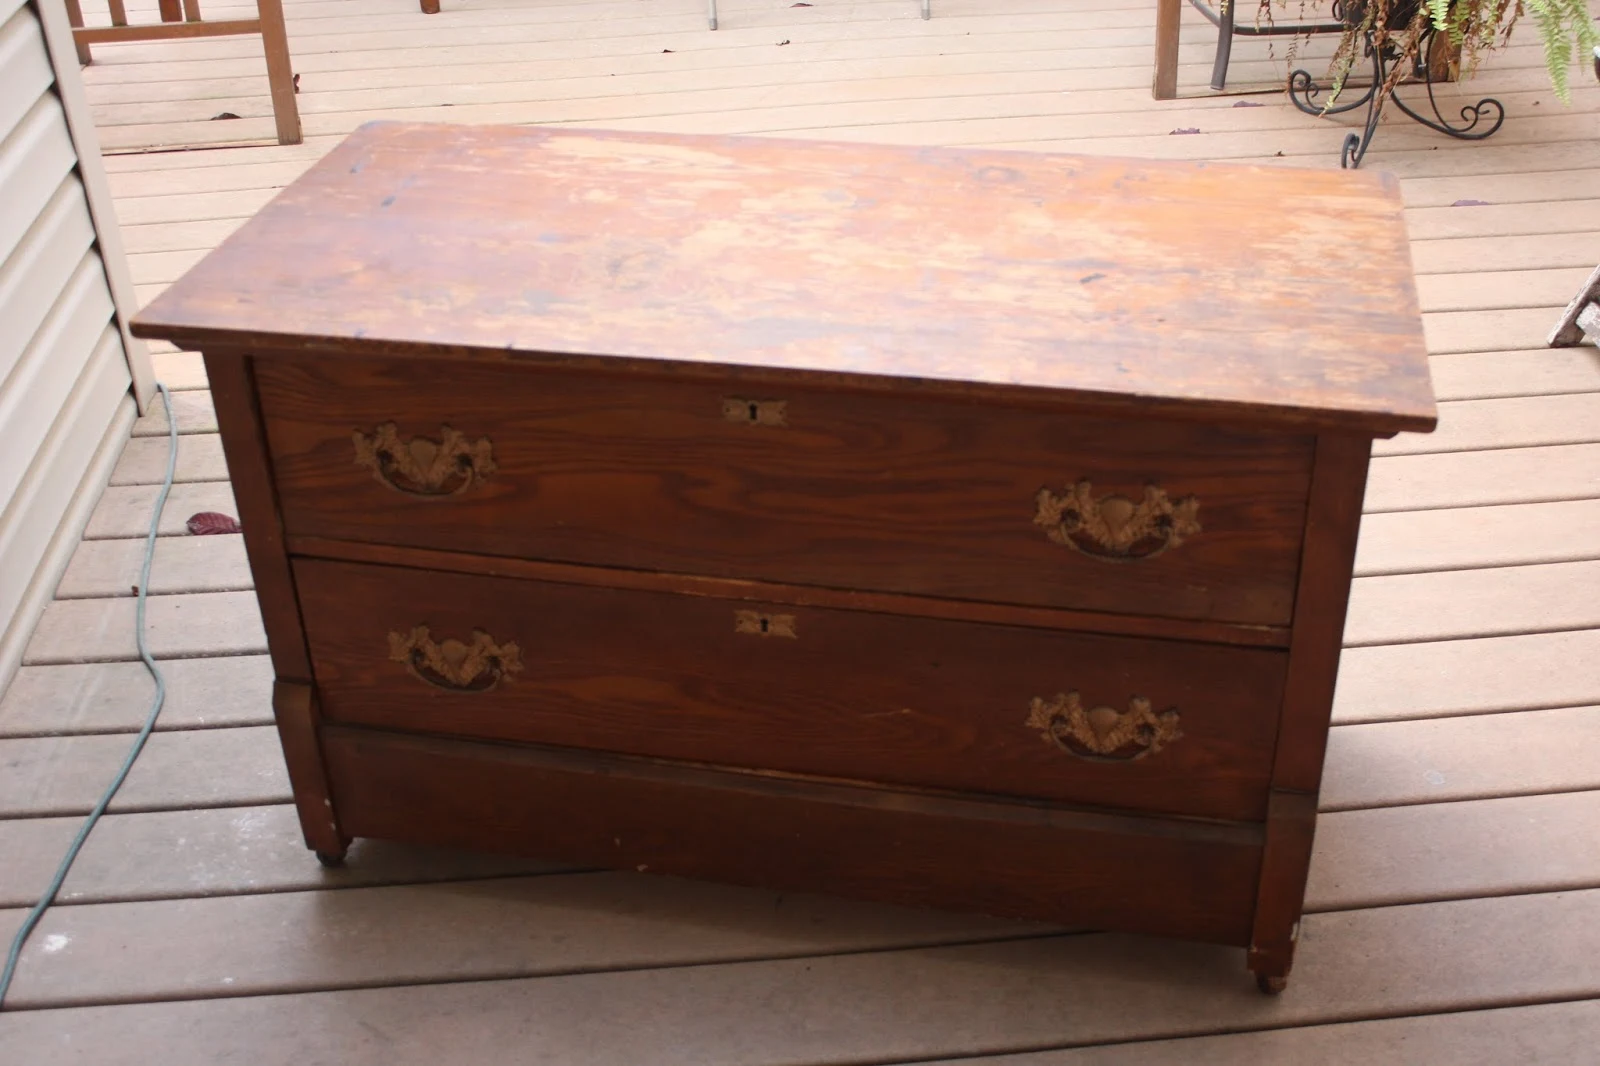
If I had to guess the date of the dresser, I would say circa late 1800's to early 1900's and lean towards the 1900's. It rests on wood wheels and has stamped brass hardware with a copper finish. Each drawer has a lock, but there wasn't a key included. It's constructed of solid wood, and although from a distance it looks likes it's in fabulous condition, on closer inspection in was in rough shape.
 |
| Before: Looks good from a distance, but it was in rough shape. |
The top was in particularly bad shape with uneven wear and dark ring marks.
 |
| Poor condition on the top |
This shot from the back of the dresser gives a better view of the uneven finish. I decided to start working on the top first and then come up with a design plan afterwards.
 |
| Start with the worst area first before finalizing a design plan |
During
I took the "during" photos with my phone, and my Facebook app made a
video that includes cheerful background music. Or continue reading for the in-process photos.
I sanded the top with an orbital sander and removed the original finish. The wood had worn unevenly over the years and debated sanded it completely smooth. However, the wear was extensive and I was concerned about how far down it would need to be sanded, so I decided to work with what I had, and based my design on a rustic finish.
After sanding the top I applied one coat of Prairie Wheat stain, wiped off the excess, then applied a thin coat of Antique Walnut to add some depth to the crevices.
 |
| Create a custom finish with different stains. |
Usually I will wait for the stain to dry, but I was pushed for time, so I started painting the base of the dresser. For the color I selected Provence blue (Annie Sloan Chalk Paint). I used an angled brush which allowed me to quickly paint into the tight spaces. I planned on a rustic finish, so I didn't want heavy coats of paint, so this brush allowed me to easily apply thin and even coats.
 |
| Apply thin coats of paint for a rustic finish |
After applying the first coat of paint I sanded it smooth with a fine sanding sponge and then wiped away the dust with a tack cloth. I repeated the same process after applying a second thin coat of paint. Since I had not sealed the stained top yet, I covered it with aluminum foil to protect the finish from the sanding dust.
 |
| Protect the unsealed top with foil. |
After I wiped away the sanding dust with a tack cloth, I applied a coat of soft clear wax and wiped away the excess with a lint free cloth. Next I applied a decorative glaze with a sponge brush. I used shop towels to wipe away the excess. It was still a little too dark for my liking, so I used a dampened shop towel to remove even more glaze. At this point the stained wood top was dry, so I applied a coat of urethane to seal it.
 |
| Finishing touches: wax, glaze & urethane |
 |
| Exterior finished |
The dresser was just about finished, but I still needed to work on my least favorite part of any project: the interior of the drawers. I don't know why it's my least favorite part, because really it couldn't be easier. The drawers were unfinished and in good shape for vintage condition, but the wood was very dry. So I applied a coat of Feed & Wax (beeswax and orange oil) with a shop towel to condition the wood. After 20 minutes I wipe away any excess that wasn't absorbed. It leaves the drawers clean and fresh. I've used urethane in the past, but I find it leaves a chemical odor, so for interiors I now use the Feed & Wax whenever possible.
 |
| Interior drawers conditioned with Feed & Wax |
After
 |
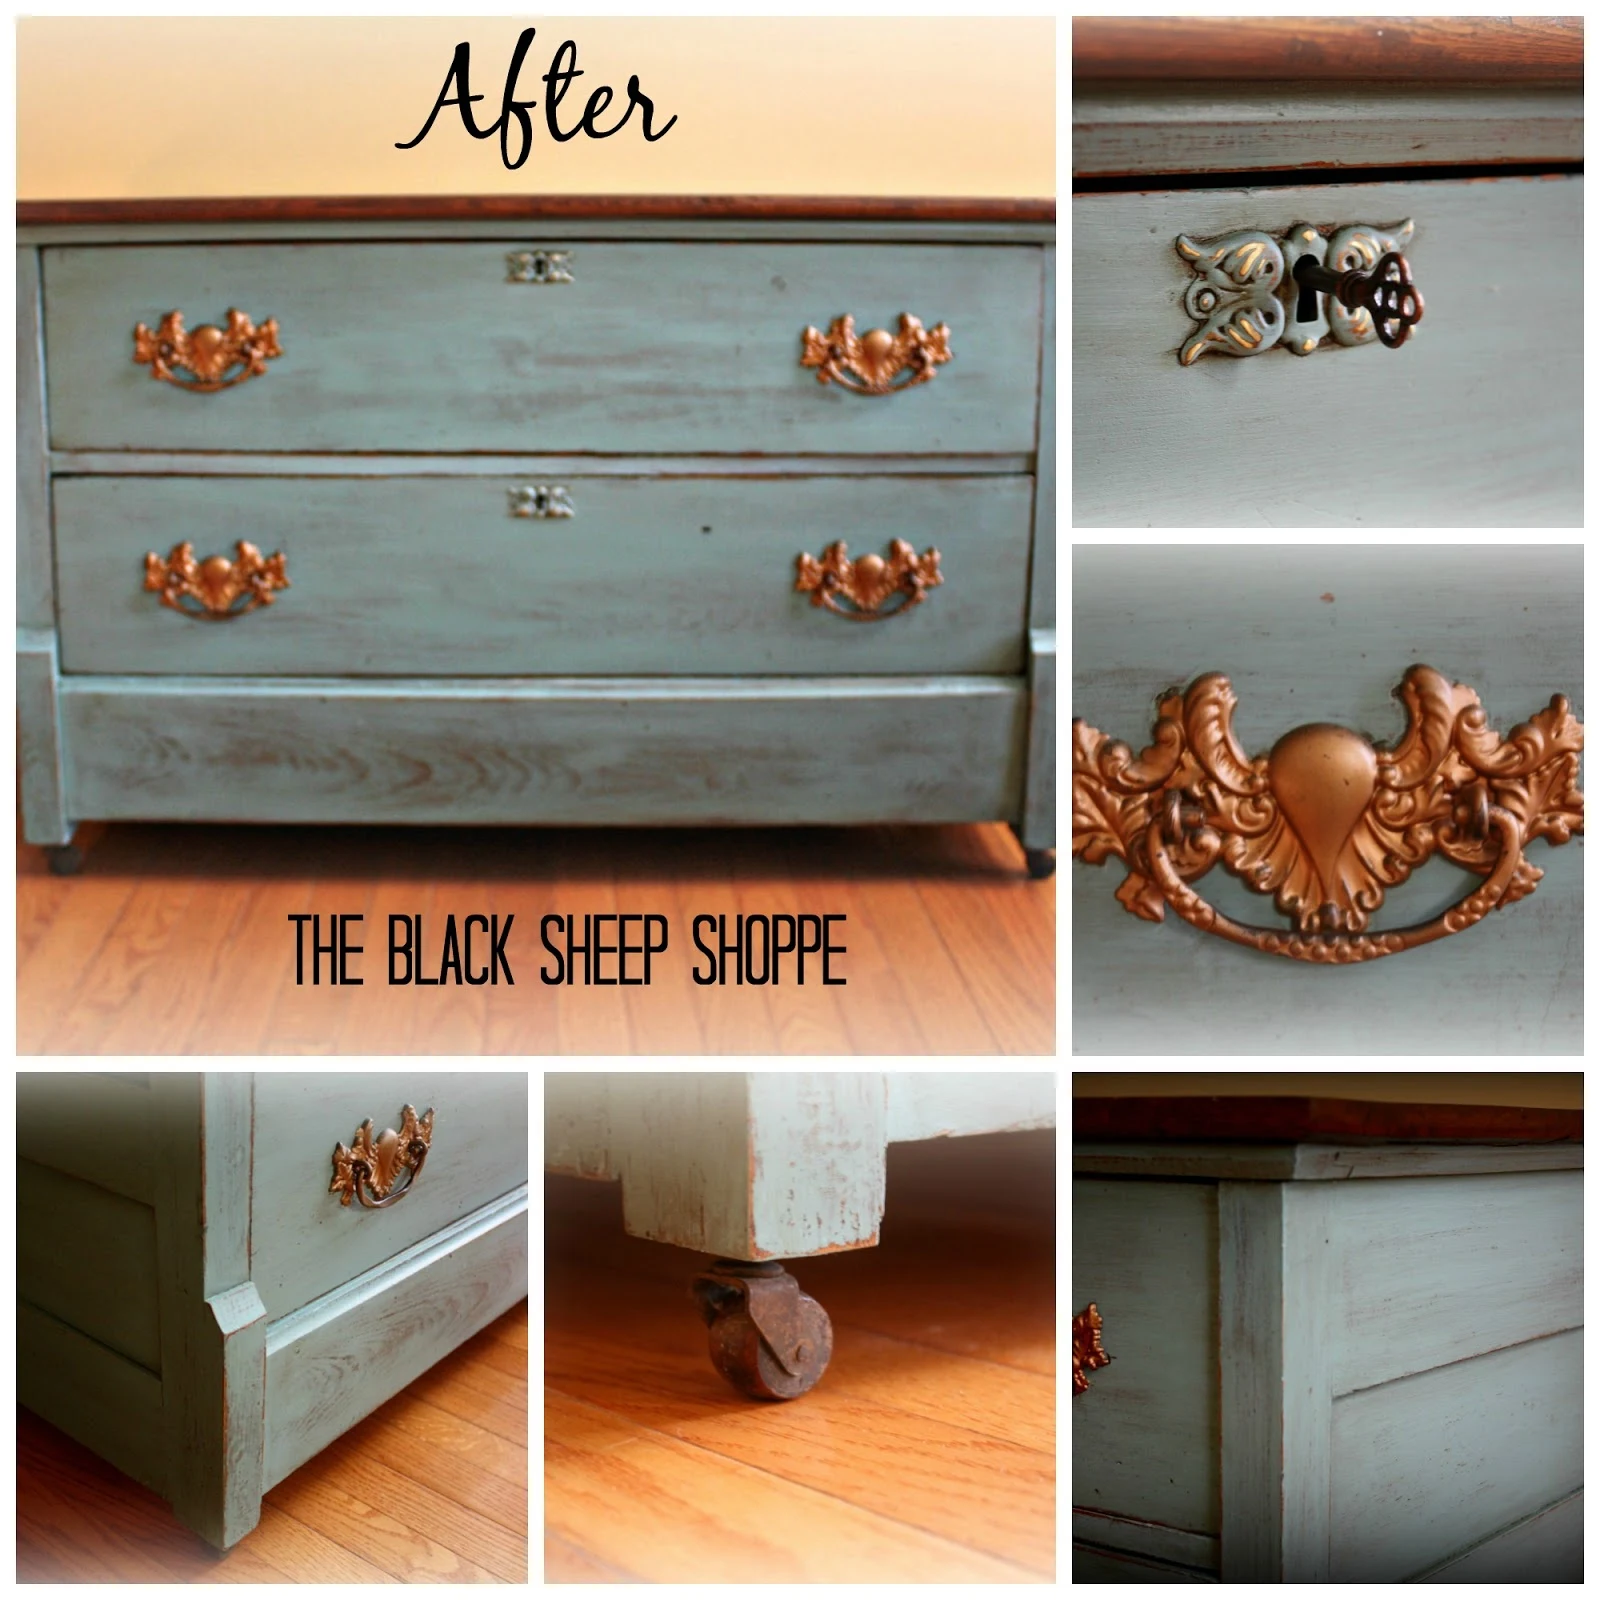
| Rustic antique dresser painted in Provence Chalk Paint by Annie Sloan |
I left the drawer pulls unpainted. They have a copper finish which I thinks works beautifully with the blue.
 |
| Drawer pulls with copper colored finish |
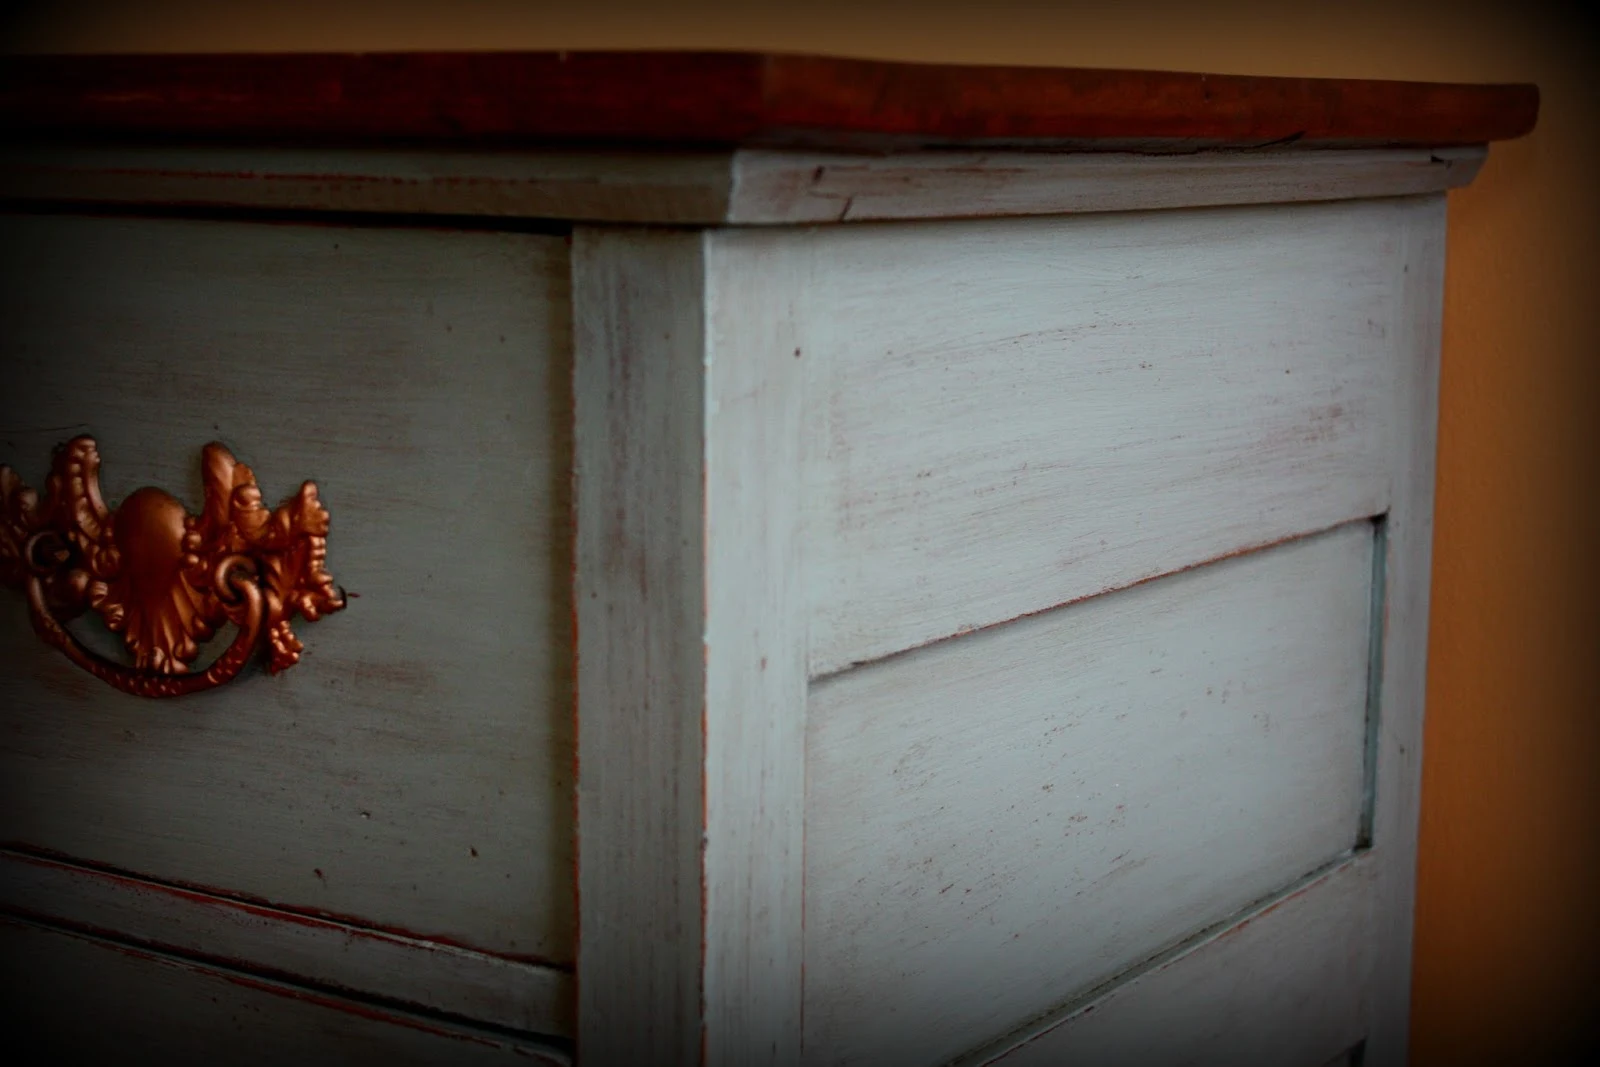
I like the combination of the stain color with the Provence blue and copper drawer pulls.
 |
| Stained top, blue base, and copper drawer pulls. |
The paint is smooth as butter and it was sanded back to give it a worn finish and reveal some of the wood grain.
 |
| Worn painted finish reveals the wood grain |
Each drawers has a keyhole, but the key wasn't included, Luckily I had a skeleton key in my stash that fits the locks perfectly!
 |
| Skeleton key fits the antique lock! |
The wood wheels add to the rustic finish. Although the wheels are a bit rustic, they are actually in great shape. (Two extra wheels were included with the dresser, so it's nice to have a couple of spares just in case!)
 |
| Antique wood wheels |
It obviously works well as a dresser or as a blanket chest. But I think it would work well as a TV console or even in a mudroom or entryway.
Dimensions: 25 1/2" high x 20" deep x 42" long.
 |
| Finished antique dresser painted in Provence blue (Annie Sloan Chalk Paint) |
Supply List
If you would like to achieve a similar look for your project, the following is a list of the supplies I used on today's project (some contain affiliate links):
- Orbital sander and variety pack of sand paper (60, 80, 100, 150, 200-grit). The sander is an investment, but it makes quick work of the job and many times eliminates the need for messy chemical strippers. You can find it for $50 or less and if you work on a lot of projects it's worth it.
- General Finishes Gel Stains Prairie Wheat and Antique Walnut
- General Finishes Gel Top Coat Urethane Satin Finish
- Feed & Wax (for drawer interiors)
- Chalk Paint by Annie Sloan (Provence) and soft clear wax. If you're not near a local stockist, you can search for stockists that ship orders online.
- Decorative Glaze (For this project I used the Rustoleum brand, but I also use General Finishes brand. Either one should give you awesome results.)
- Angled paint brush (perfect for cutting in corners and applying a thin even coat of paint)
- Sponge brushes (for stains and glaze). I keep a large supply on hand since I work on so many projects.
- Flexible sanding pad (perfect to get a worn finish). These come in a box of 20, but I cut them in half so I get 40! One box will last for a very long time. The pads can be re-used for multiple projects. The pads also come in a superfine finish for even smoother results.
- Tack cloth (for removing sanding dust)
- Shop towels (for removing excess glaze)
- Lint free shop rags (for removing excess wax). These can also be used to buff the wax.


Comments
Post a Comment
Select the NOTIFY ME box to receive a notification of a reply to your comment (yes, I do try to acknowledge all comments). There might be a publishing delay on older posts as they are moderated to reduce spam.