I absolutely love the sweet giraffe created in this mosaic crochet pattern! But I must admit the pattern was challenging. Nevertheless, I was glad I did this project, and I am so happy with the finished blanket.
The name of the pattern is The Giraffe Mosaic Blanket by Natilia Kononova. If you're interested in purchasing the pattern you can find it on Ravelry HERE (no affiliation). The purchased pattern includes instructions for both a baby blanket size as well as a lapghan (or toddler size). I started the project as a gift for a baby due in two months. I chose to make the larger size so it would be something he could grow into.
 |
| Getting started. |
Mosaic crochet alternates two colors and each row is started with a new strand of color and cut after the row is completed. Which creates a lot of tails! But don't worry the tails are later knotted and hidden within a double border, so there aren't any tails to sew in!
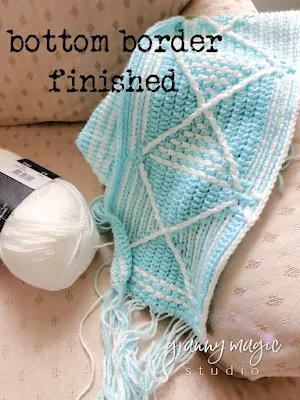 |
| Bottom of mosaic border finished. |
This isn't my first mosaic crochet project, but as I mentioned earlier it was challenging. Especially once I began working on the giraffe section within the border. I tried following the graphs, but ended up printing the pattern (40+ pages, 2 columns each page) to work from . It was still difficult for my eyes to keep their place within the pattern while I was working, so I created a homemade pattern guide.
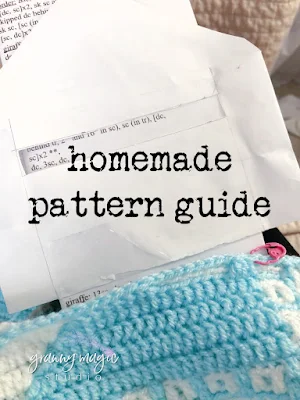 |
| Homemade pattern guide. |
I cut a small "window" in an envelope and then added a slit at the bottom so I could feed the printed pattern through the envelope. Trust me when I say the pattern is detailed, so being able to focus on a specific section at a time was very helpful to me.
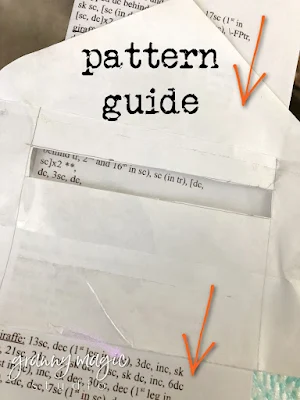 |
| Slide the pattern through the envelope. |
Using the guide I was able to finish the bottom of the border fairly quickly.
 |
| Mosaic crochet. |
The giraffe section slowed me down quite a bit. It's one of those patterns where you don't want anyone to talk to you while you're concentrating! I had planned to take photos of my progress but didn't because I was in full-concentration mode.
There is an option to add a third color for the giraffe face which I did. I stopped to take a few photos to the tail ends.
 |
| Yarn tails. |
These tails do need to be sewn in which I didn't mind, but if you don't like to sew in the tails you can stick with two colors only.
 |
| Neatly sew in the tail ends. |
I was almost finished and just needed to work on the double border, but then my project was interrupted by an early baby arrival!
 |
| The many tail ends will be hidden later. |
I left my crochet project unfinished and rushed to meet my new grandson!
 |
| Grandma and Henry! |
Meet Henry! Isn't he adorable? He's the sweetest baby!
 |
| Henry! |
I was very sad when my visit ended. But when I got home I pulled out the blanket and got busy finishing up crocheting the double border to hide the tail ends.
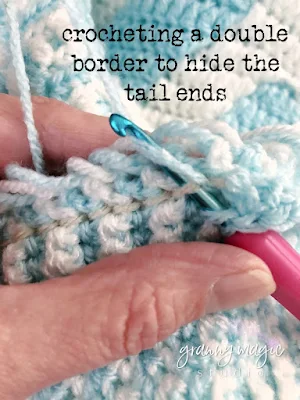 |
| Crocheting a double border. |
I finished the blanket just before another visit to see Henry. So I took a few quick photos of the blanket before I packaged it up in a gift box. The lighting wasn't ideal, but I hope you enjoy the finished photos.
 |
| Mosaic Giraffe Blanket |
The details of each stitch were quite clever. Although I didn't design the pattern, I felt clever myself for following the directions properly.
 |
| The giraffe was created with a mosaic pattern. |
There is an obvious front and back to the blanket, but the back side has an interesting pattern as well.
 |
| Back of the blanket. |
Remember all the yarn tails? They are hidden within the outer double border!
 |
| The outer border hides the tail ends. |
I especially liked the mosaic design within the corners of the blanket.
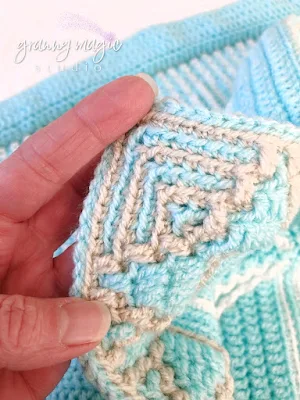 |
| Mosaic design. |
The double border is a little thicker than the rest of the blanket, but it's not out of proportion.
 |
| Thickness of double crochet border. |
Now it's time to fold the blanket up and put it in a gift box.
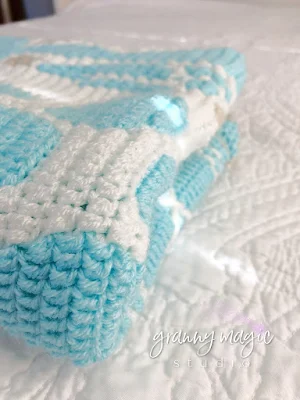 |
| Baby blanket folded and ready to box. |
I am happy to have finished the blanket and to give it to Henry!
 |
| Love, love, love! Henry! |
YARN INFORMATION:
- Urk (1034), 100g, 7 skeins (blue)
- Barneveld (1005) 100g, 6 skeins (white)
- Zandvoort (1218), 100g, 1 skein (beige)
I had two full skeins of blue and one white leftover after finishing the project. I would most likely have used most of the white, except I used the beige within the double border instead of white. I am planning on using the leftover yarn for another project, but I haven't decided what that will be yet.
If I make this pattern again, I think I will try it with
Stonewashed. I used the Stonewashed for another project and love the feel and stitch definition. It's a cotton and acrylic blend.
The specific yarn is not always available on
Amazon, so when not available for quick shipping I will order from Wool Warehouse in the UK. There is a somewhat hefty overseas shipping fee, but the orders are processed promptly and arrive fairly quickly.


Nice!
ReplyDelete