I purchased this piece at a local thrift store and knew a little bit of paint would freshen up the look in a good way.
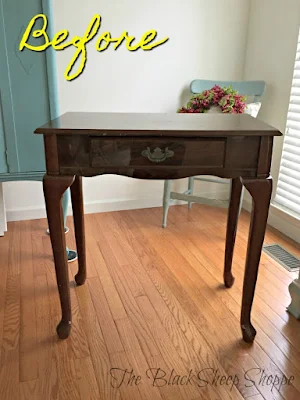 |
| Cheap make-up table found at a local thrift store. |
It was once a small vanity table as evidenced by the drilled holes on the back of the table top. But the mirror was long gone, so I filled in the holes prior to painting. Can you see how shiny and smooth the finish is? I get a lot of questions about whether laminated and/or shiny finishes can be painted, and the answer is "yes"!
 |
| Can you paint laminate? Yes! |
I won't go into great detail on this post, but I've covered the topic about painting laminate in previous posts, which if you want more details and photos, please click
HERE to read more about it.
But to summarize the process:
- First clean the furniture to make sure it is free of dust, dirt, and oils.
- Next lightly sand the surface with 220-grit sandpaper or sanding block. The goal is to slightly rough up the surface to give the paint a bit of something to grip to. (You'll notice in the photo below that the surface is still quite smooth even after I sanded it.)
- Clean away the sanding dust. I use a tack cloth to quickly remove the residue.
- Paint a thin light first coat of chalk paint. For this project I used Annie Sloan Chalk Paint (link updated to the US equivalent Jolie Chalk Paint in Bliss).
- If you use a different brand you might need to paint a primer coat first.
- Apply the second coat. Most likely this will be your final coat, but apply more coats as needed.
- Seal the paint with clear finishing wax or other appropriate top coat, such as an acrylic topcoat.
 |
| Follow these easy steps to paint laminate. |
The drawer was in OK shape, but I wanted to give it a fresh new look, too. So I painted the sides of the drawer and added a pretty drawer liner to the bottom (see finished photo in the "after" section below).
 |
| Apply finishing touches to the inside of drawers. |
AFTER:
I used one of my favorite go-to color combinations: Duck Egg Blue and Coco.
 |
| Cheap laminated desk transformed with paint. |
Although this piece was orginally a vanity, I think it will work quite well as either a small writing desk or an entryway or hall table.
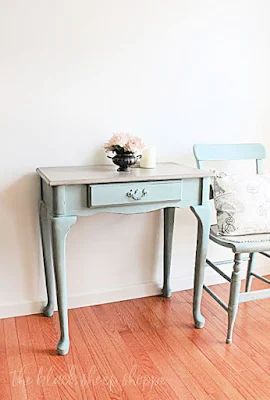 |
| Thrift store furniture makeover. |
Either way, what once was a cheap looking piece of furniture, is now very elegant!
 |
| From cheap looking to elegant. |
The top measures 28" x 16" which is a perfect size for a small work space.
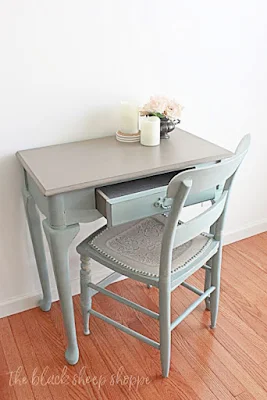 |
| Small furniture can be versatile. |
Prior
to waxing I lightly distressed the front of the desk with a damp cloth.
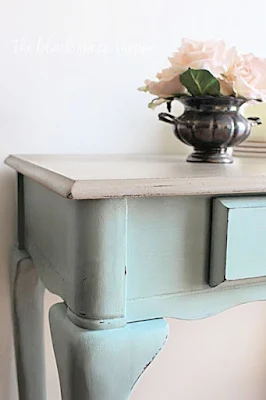 |
| Light distressing adds character. |
The top is painted in Coco, and the base is painted in Duck Egg Blue.
 |
| The base is painted Duck Egg and the top Coco. |
 |
| Colorway is Duck Egg Blue and Coco Chalk Paint. |
I lined the bottom of the drawer with a
lavender scented drawer liner using
double side tape. I was excited to find this very affordable and pretty paper. Well it WAS affordable when I bought it. I paid about $4 for two six-sheet sets. But the price as of today is closer to $18. I'm not sure what is driving the price increase, but for 12 sheets I suppose it is still a good deal. Nevertheless, I wish I had ordered more at the lower price!
I am keeping the link here to what I actually purchased, but don't be shy about searching for a better deal.
 |
| I added lightly scented drawer liners. |
I hope you enjoyed seeing the makeover and learned how to give a classic look to cheap looking furniture. Thank you so much for visiting The Black Sheep Shoppe today!
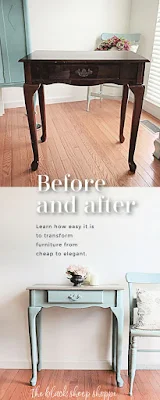 |
| Before and After Thriftstore Furniture |
 |
| Learn how to paint laminate furniture for a high end look. |


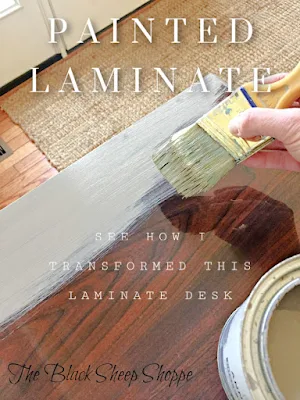


I really like the finished look especially given that it was that shiny finish. Don't think you said how you plugged the holes on the top but it was probably putty or the dowel trick? I think you need more staging items; a small lamp would look really great especially since it could be a writing table/desk. I especially like the scented drawer liner nicely done! Thank You
ReplyDeleteThanks so much Mary! To fill the holes I taped the bottom of each hole and then injected wood filler with a syringe. After it was dry I sanded it smooth.
DeleteThe piece looks beautiful but the top looks different shade. Did you do something on top?
ReplyDeleteThank you! The top is painted in Coco and the bottom is painted Duck Egg.
Delete