Today's article includes step-by-step instructions on how to create a shabby chic look with Chalk Paint. I will focus on the basics: Prep work, paint, sanding, and sealing with wax.
Before
If you're new to painting furniture or to using Chalk Paint, then I recommend you start with a small project. I selected a small side table with fairly simple lines. Alternatively, you could shop the thrift stores and look for a small wooden item, such as a shelf or a jewelry box.
 |
| Before |
The finish has some imperfections, but that will work nicely with a shabby chic finish.
 |
| Pits and scratches in wood table top. |
Prep Work
Not all projects require extensive prep work. Mostly it will just need a good cleaning. Chalk Paint can usually be painted right over the existing finish. However, with older pieces of furniture and light paint, the tannins in the wood might bleed through resulting in a splotchy finish. I was fairly certain this would occur, so I applied shellac with a foam brush as a precautionary measure. The shellac dries very quickly and seals in the wood tannins.
 |
| Use a foam brush to apply shellac. |
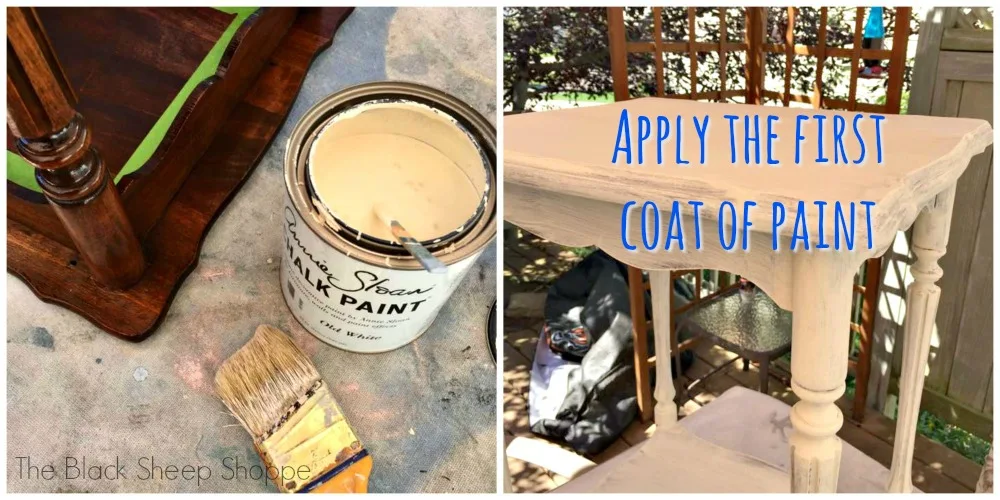
First Coat of Paint
Nine times out of ten the first coat of paint will look uneven. But don't despair! The next coat will really start to look good.
 |
| Applying the first coat of paint. |
Sanding the Paint Smooth
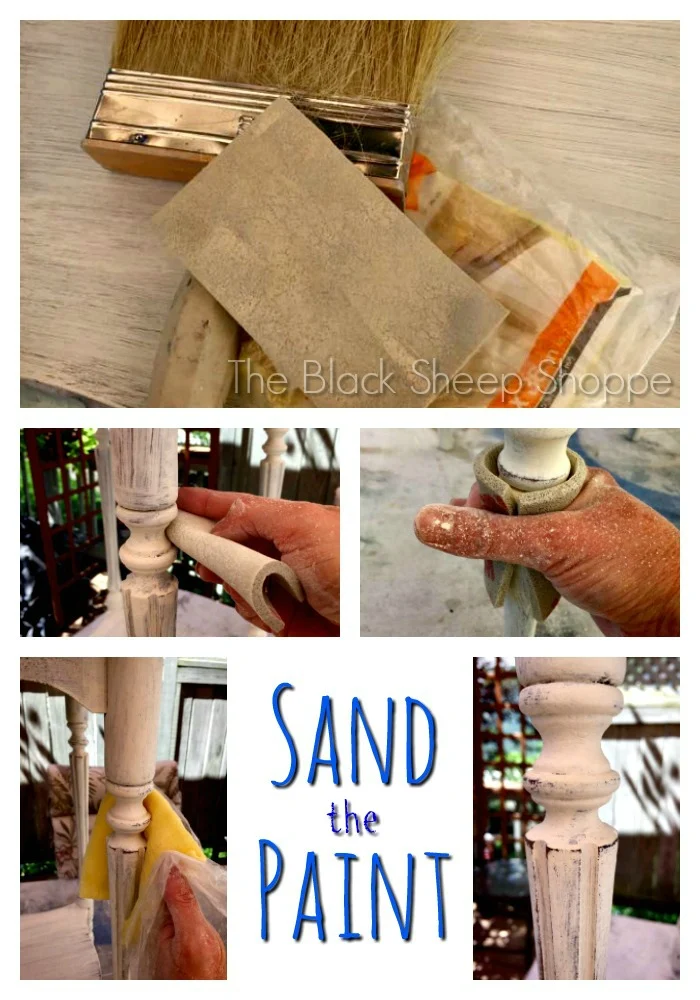
This step isn't required, but one of the wonderful properties of chalk paint is how beautifully it reacts to sanding. For a smooth finish it's best to sand in between coats of paint. I used a flexible sanding pad which is especially helpful when sanding table legs or spindles. I apply more pressure in any spots that I want a distressed finish. After sanding I use a large brush to remove most of the sanding dust. Next I use a tack cloth to remove the residual sanding dust.
Then I finish with a second coat of paint. Doesn't it look better already? I repeated the sanding process after the second coat dried. I was happy with the look at this point, but a third coat (or more) could be applied until you get the look you want.
 |
| Second coat of paint. |
Sealing the Paint with Wax
The chalk paint does need to be sealed to preserve the finish. I know many people are intimidated by this process, but it's rather easy, although I admit there is a learning curve to the process. That's why it's important to practice on a smaller project to start. I think the biggest mistake most people (including myself) initially make is using too much wax to start with.
For the waxing step I use soft clear wax, a wax brush, and three types of cloths to remove the excess wax.
 |
| Furniture wax and supplies. |
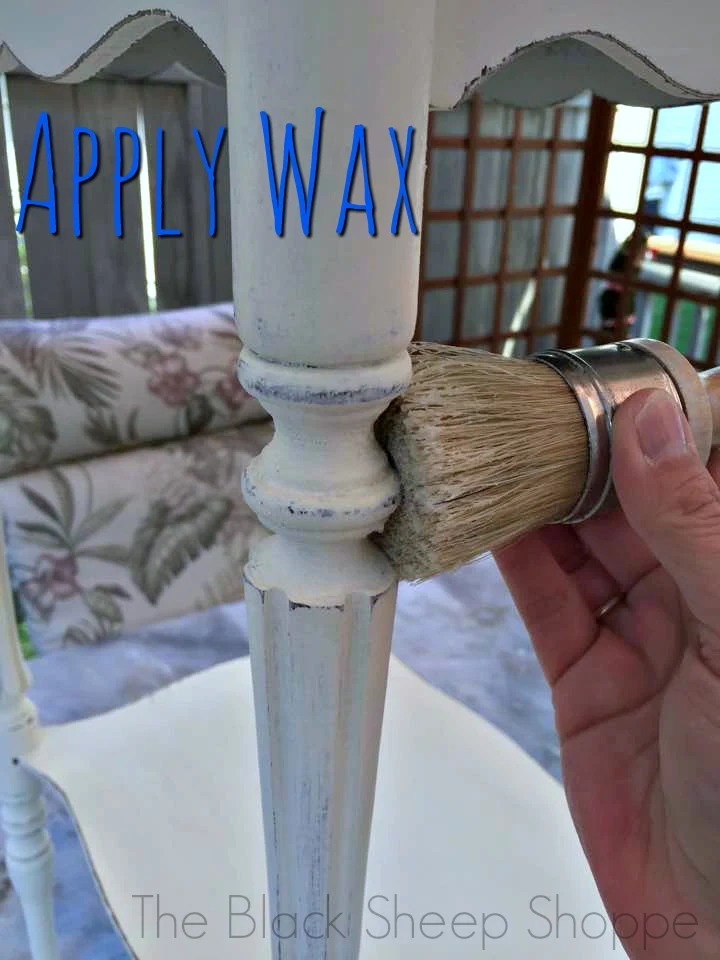
Divide the waxing steps into sections. For instance, I will start on the top from start to finish, then start on another section. First dip your brush into the wax and apply a small amount over the painted finish. Use the brush to work the wax into the paint and create a thin layer of wax. You don't need a heavy hand here. Instead let the brush do the work. The wax will feel slippery and moist at this point.
 |
| Applying wax with a wax brush. |
The chalk paint immediately begins to absorb the wax and the color will deepen slightly. Although the wax is applied in a thin layer, it's important to remove any excess that wasn't absorbed by the paint. My tried-and-true method for a perfect waxed finish is to use three types of cloths. It's sounds a bit time consuming, but it's really about as easy as using a dust cloth to wipe furniture.
First I use a flour sack towel to wipe off the excess wax using long strokes. The flour sack has a bit of texture to it and helps grip the wax. This step removes most of the wax, and it will begin to feel less tacky. Next I use a shop rag which has less texture to the fabric. It pulls a little more of the wax off, but overall it will feel smooth and silky as it glides over the waxed finish. Finally I repeat the process with a blue shop towel. Once again at this point it will generally feel quite smooth and shiny, but this step will remove any residual wax that might be remaining. It will definitely feel "dry" to the touch at this point, but the wax will need to fully cure and harden for a few weeks.
After
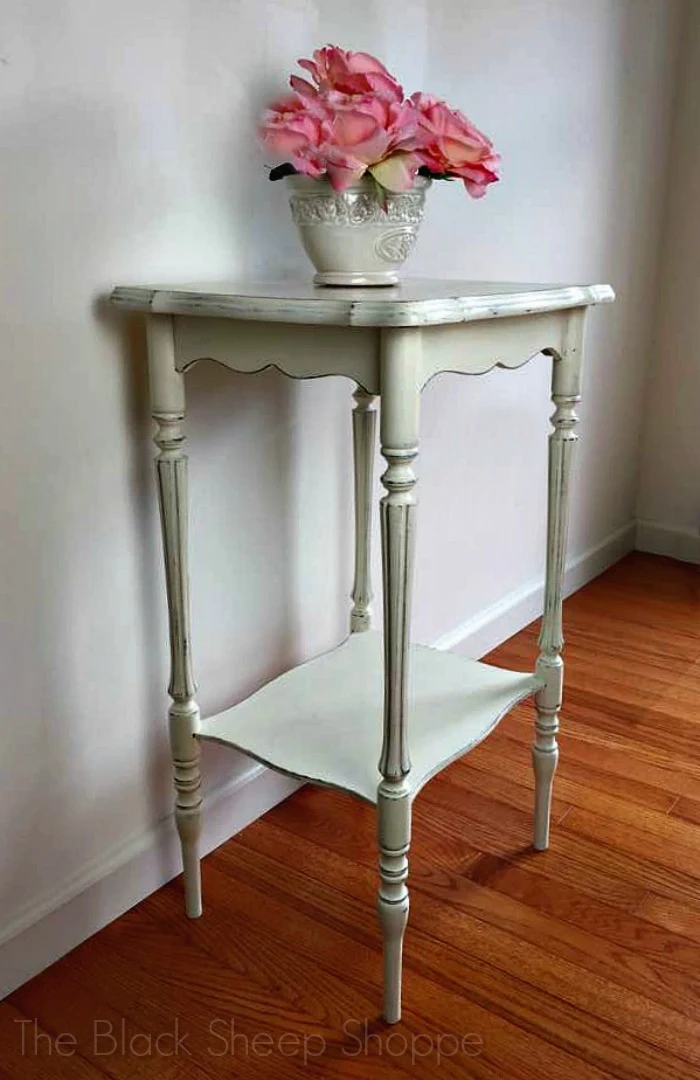
And here's the table with it's new romantic shabby chic finish!
 |
| Side table with a shabby chic finish. |
The use of one neutral color makes it a lovely back drop piece in a room.
 |
| Side table painted in Old White (Annie Sloan Chalk Paint). |
Because it's neutral it will allow colorful accessories to pop.
 |
| Neutral painted furniture allows colorful accessories to pop. |
If you look closely you can see the the pitting in the wood is visible. But it's not too noticeable and it works well overall with the distressed finish.
 |
| Close up of table top. |
I hope you enjoyed today's tutorial. If I can help you with your project in anyway then please let me know. I'd like to invite you to subscribe to receive email alerts of new projects -- just enter your email address in the subscribe box at the top right of this page. Or you can follow me on
Facebook.
 |
| Shabby chic table with vase of pink flowers. |
Supply List
Below are the supplies I used for this project. Some links are affiliate links.


Comments
Post a Comment
Select the NOTIFY ME box to receive a notification of a reply to your comment (yes, I do try to acknowledge all comments). There might be a publishing delay on older posts as they are moderated to reduce spam.