French Country Table and Chairs
Today's project is about combining mismatched furniture to become a set. I bought the pair of chairs first and then found the table on another shopping trip at a different thrift store.
This is actually two projects rolled into one, so I'll start with the chairs and finish with the table. There's a supply list at the end of the post in case you're interested in creating a similar look.
THE CHAIRS: BEFORE
The chairs are set of pressed back chairs. The design on the back is pressed into the wood, hence the name. |
| Before: Pressed back chairs |
The chairs were in good shape except for the finish which was scratched, worn away in spots, and had goop of unknown origin. I decided to strip the seats prior to painting.
 |
| Damaged finish on chair seat. |
Removing either paint or varnish is always a bit of a messy job. I applied CitriStrip and let it set for a bit and then scrubbed it with #0000 steel wool. After that was cleaned up I used my mouse sander to sand away any stray varnish still remaining and also smoothed out scratches. I applied two coats of danish oil and allowed it to soak into the wood before wiping it away.
 |
| Stripping varnish and refinishing chair seat. |
THE TABLE: BEFORE
The table is made of solid oak and very sturdy. I love the round shape resting on a pedestal. It also came with two leaves.It's solid oak except for the top which has a manufactured laminate glued to the top. I would have loved to remove the laminate, but this was factory sealed and wasn't budging. The surface was very shiny and most paints won't stick without a primer coat, but I knew Chalk Paint would do the trick.
 |
| Oak table with shiny laminate top. |
Because the surface was so smooth and shiny it required a little bit of sanding to rough it up a bit and give the paint something to "grab" onto.
 |
| Lightly sanding the surface in preparation for Chalk Paint. |
I chose a French Country blue and yellow color scheme for the table.
 |
| Arles (Annie Sloan Chalk Paint) |
I applied a very thin first rough coat using my vintage effects brush. It created just the right amount of texture for my second full coat to grip on to. After the paint was dry, I lightly sanded against the grain of my brushstrokes. This smoothed out the paint to a smooth surface.
 |
| Applying the first coat of Arles. |
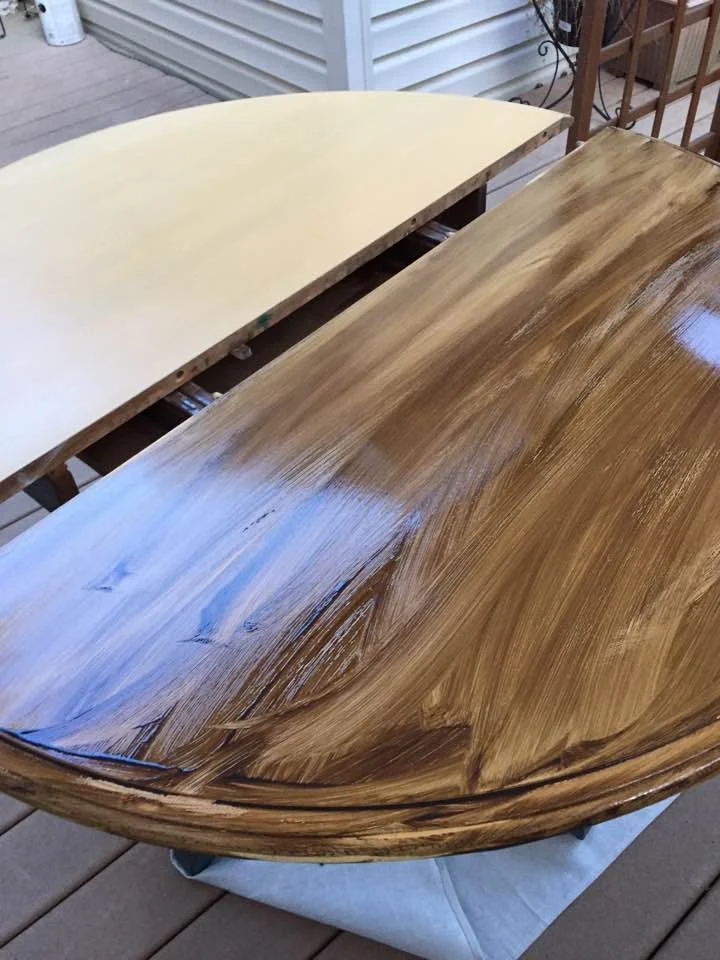
I sealed the paint with soft clear wax and then applied a dark glaze. It's key to seal the paint prior to adding a glaze otherwise the glaze will absorb into the paint. I wiped back the glaze and then repeated the process until I achieved the look I wanted.
 |
| Applying dark glaze over Arles. |
Next I painted the table base and chairs in Aubusson blue, sealed with clear wax, and finished it with dark wax.
 |
| Aubusson blue (Annie Sloan Chalk Paint). |
AFTER
As I mentioned at the beginning of this post, the table and chairs were not originally a set. However the spindles of the chairs coordinate with the turned base of the pedestal. The paint color groups the items together for a set. |
| French country table and chair set in Aubusson blue and Arles. |
The natural wood on the chair seats provides a nice contrast against the blue paint.
 |
| Pair of pressed back chairs painted in Aubusson blue. |
I lightly sanded the carvings to give it a bit more visual definition.
 |
| Detailed design on pressed back chairs. |
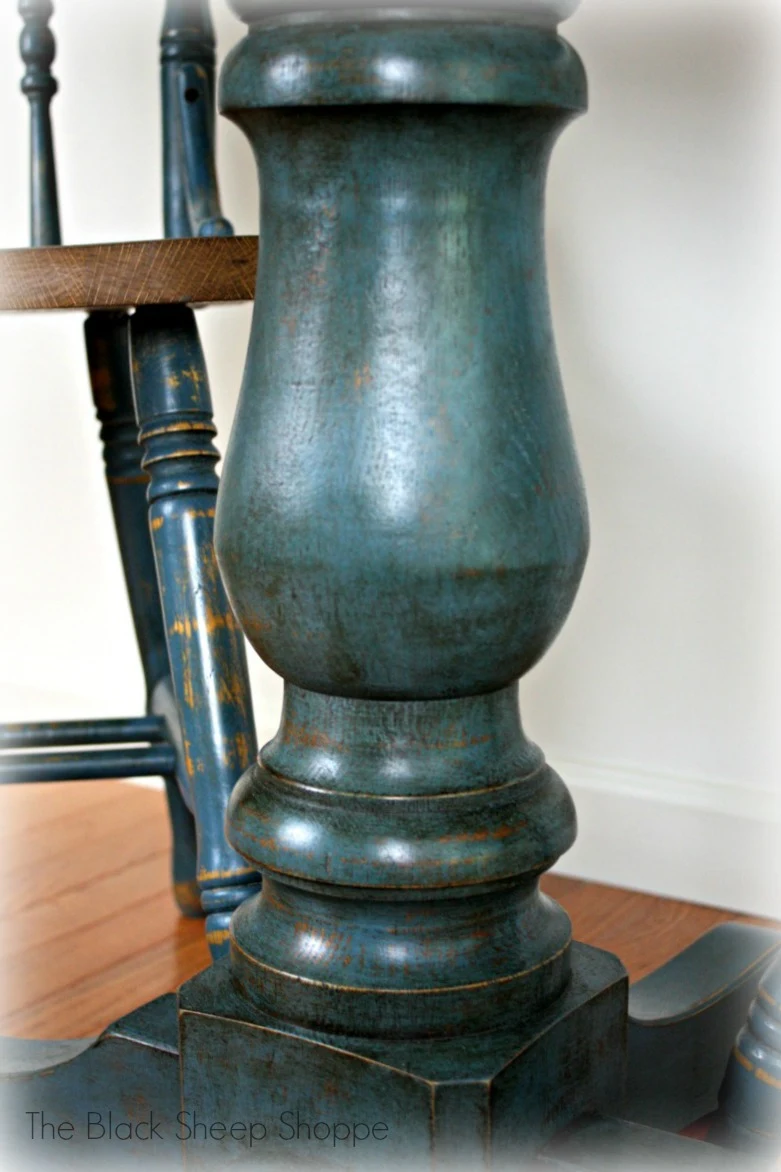
The table base was distressed and the dark wax gives it a lovely patina.
 |
| Pedestal table base painted in Aubusson, distressed, and aged with dark wax. |
The glaze provides additional contrast on the yellow of the table top.
 |
| Dark glaze over Arles adds additional depth and contrast. |
The glaze worked nicely over the smooth surface because of the subtle texture built up with the brush strokes in multiple layers.
 |
| Subtle texture created with brush strokes helps the glazing technique. |
I also painted the two leaves to match the table top.
 |
| The set also includes two leaves for the table. |
SUPPLY LIST
Below are the supplies I used for this project. Some links are affiliate links.- CitriStrip
- Steel wool #0000
- Gloves
- Mouse sander
- Tack cloths
- Danish Oil
- Aubusson (blue) and Arles (yellow) Chalk Paint, clear wax, dark wax
- Wooster Vintage Effects paintbrush (2" angled china bristle)
- Decorative Glaze
- Foam brushes
- Shop towels
EDITED: A reader asked to see a better photo of the refinished table top, so I'm adding a photo to give more of an overview.
 |
| Overview photo of table top. |


Wow, fabulous job.
ReplyDeleteThank you Ivory Jean!
DeleteBeautiful set! I'm a newbie to this and have read several articles that recommend using a polyacrylic finish on tabletops rather than a wax sealer. I am so confused!
ReplyDeleteThank you Marge. I think the decision to use polyacrylic vs wax is a personal choice. There are pros and cons to each. I love the finish of Annie Sloan's soft wax and it's quite durable if applied properly and given the chance to cure fully. An alternative is General Finishes High Performance Top Coat. You can apply it with a foam brush and use a fine sand paper after it dries to get a smooth finish. In either case, 2-3 coats for a table top will assure better protection. If you're still unsure then I recommend getting a couple of small projects to practice on and test out which method works best for you. Good luck and enjoy the process!
Delete