Today's project is about how to create a themed nursery piece. It's so easy to get a professional result with the added bonus of being super easy. Oh yeah and even better it doesn't cost a lot of money! My project is a vintage child's chifferobe. It was a little worse for wear, but I knew just what I wanted to do with it. I decided to paint the furniture, but if you prefer not to paint your piece that's OK, too!
PREP WORK
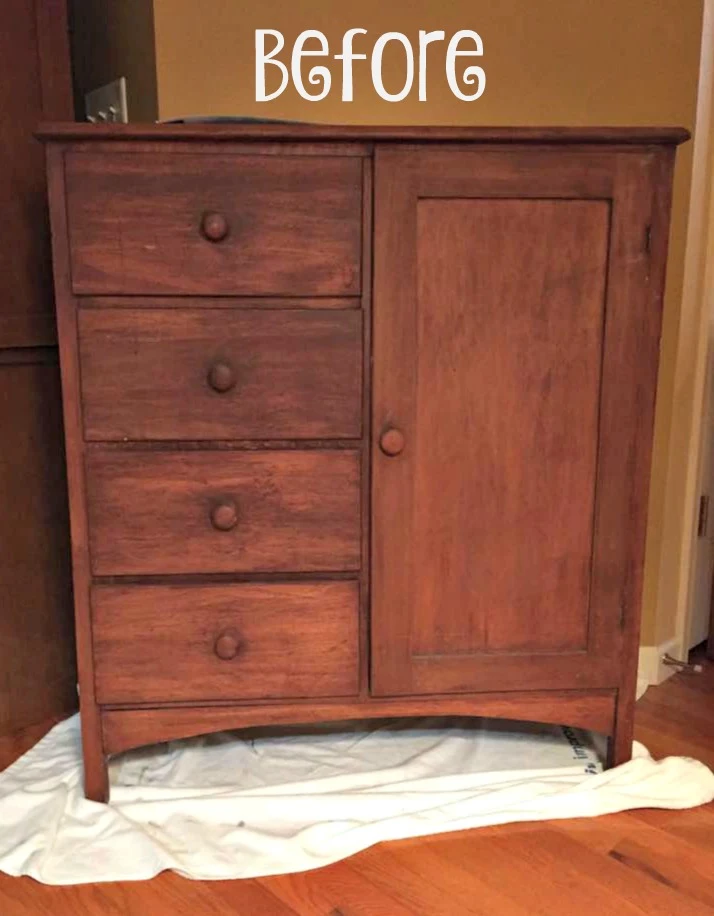
The chifferobe has 4 drawers for storage and the other side has a wardrobe area for hanging clothes. The clothing rod was missing, so I purchased a dowel that I will add before taking it to the booth.
 |
| Before: Child's chifferobe |
I applied two coats of shellac to both the exterior and interior to seal the wood and prevent bleed through. The shellac is easily applied with a sponge brush and dries super-quick.
 |
| Apply shellac to prevent bleed through. |
THE FUN PART:
I mixed equal parts of Antibes with Antoinette and added a splash of Old White.
 |
| Equal parts Antibes and Antoinette with a splash of Old White. |
The result was a retro-vintage green. I applied two coats of paint to the exterior.
 |
| Vintage green: Antibes, Antoinette and Old White. |
I had mixed enough paint to apply two coats of the green to the exterior. I had a tiny bit of paint left and used that on the bottom section of the interior of the wardrobe to create an area of grass.
 |
| Green applied for a grassy area. |
I used Louis Blue next to create a sky. The interior was a tight space to work in with lots of corners, so I used an angled brush to speed up the process. I layered some Old White over the blue to soften the color and give it a feeling of clouds.
I used Annie Sloan soft clear wax on the exterior. But the interior was tight to work in, so I used Americana Decor Creme Wax on the inside as it is easier to brush on.
 |
| Americana Decor Cream Wax. |
The Creme Wax is a liquid and is very quick and easy to brush on and dries quickly. It doesn't give the same finish as Annie Sloan's brand, but I think it worked well in this section.
 |
| Brushing on a liquid wax. |
I ordered a set of
Peter Rabbit wall decals. The decals adhered well to the painted finish. At the same time they are easy enough to remove and re-position as needed making it very easy to work with.
AFTER
I painted the top, wardrobe front and handles in Old White for contrast. I applied a white glaze over the green to soften the color just a bit.
 |
| After: Vintage chifferobe with Peter Rabbit theme. |
The wardrobe interior has the green grass, blue sky, and Peter Rabbit in the garden! I love this part and can just imagine a child's delight when opening the door. Heck, I'm a grown up and I keep opening the door to look at it. Yes I am easily entertained.
 |
| Open the door and find Peter Rabbit in the garden! |
The exterior of the door features Peter Rabbit with his mother and sisters.
 |
| Peter Rabbit with his mother and sisters. |
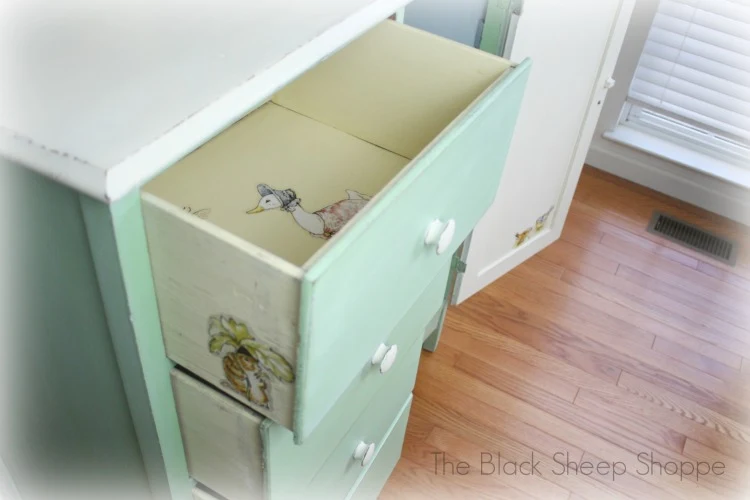
Each of the drawer interiors were painted in Cream and feature more surprises inside.
 |
| Each drawer features more surprises inside! |
Run, Peter, run!
 |
| Peter Rabbit and Mr. McGregor. Run, Peter, run! |
I hope you enjoyed this project, and I appreciate you stopping by the blog today!
Supply List:


Comments
Post a Comment
Select the NOTIFY ME box to receive a notification of a reply to your comment (yes, I do try to acknowledge all comments). There might be a publishing delay on older posts as they are moderated to reduce spam.